


|

Takin my best shot...
|
Over the years I've
become an increasingly serious amateur photographer. Recently I've
received some professional photography training which I'd like to
share. My photography class shots are updated often on Flickr at
http://www.flickr.com/photos/classshots. Although all of the ideas and techniques below have been
covered extensively elsewhere on the web, this page offers my
perspective on a
practical, learning approach for anyone who wants to move from
the bounds of point-and-shoot to the first level of digital single
lens reflex photography. Welcome to my photography page. |
 |
"Photographer at class, at rest"
Nikon D5000 62mm f22 1/200s ISO100
by Phyllis |
Controlling exposure
Exposure is how much light
is captured by the camera's sensor. Three things control camera
exposure: aperture, shutter speed and ISO sensitivity. Aperture is how wide the lens opens to let light in, measured in
"F numbers". Shutter speed is how fast the shutter opens and
closes, measured in fractions of seconds or seconds. ISO is the
sensor's relative sensitivity to light, aka film speed back in ancient times. All three
interact with each other and have different effects on the shot.
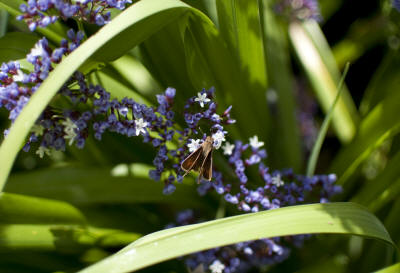
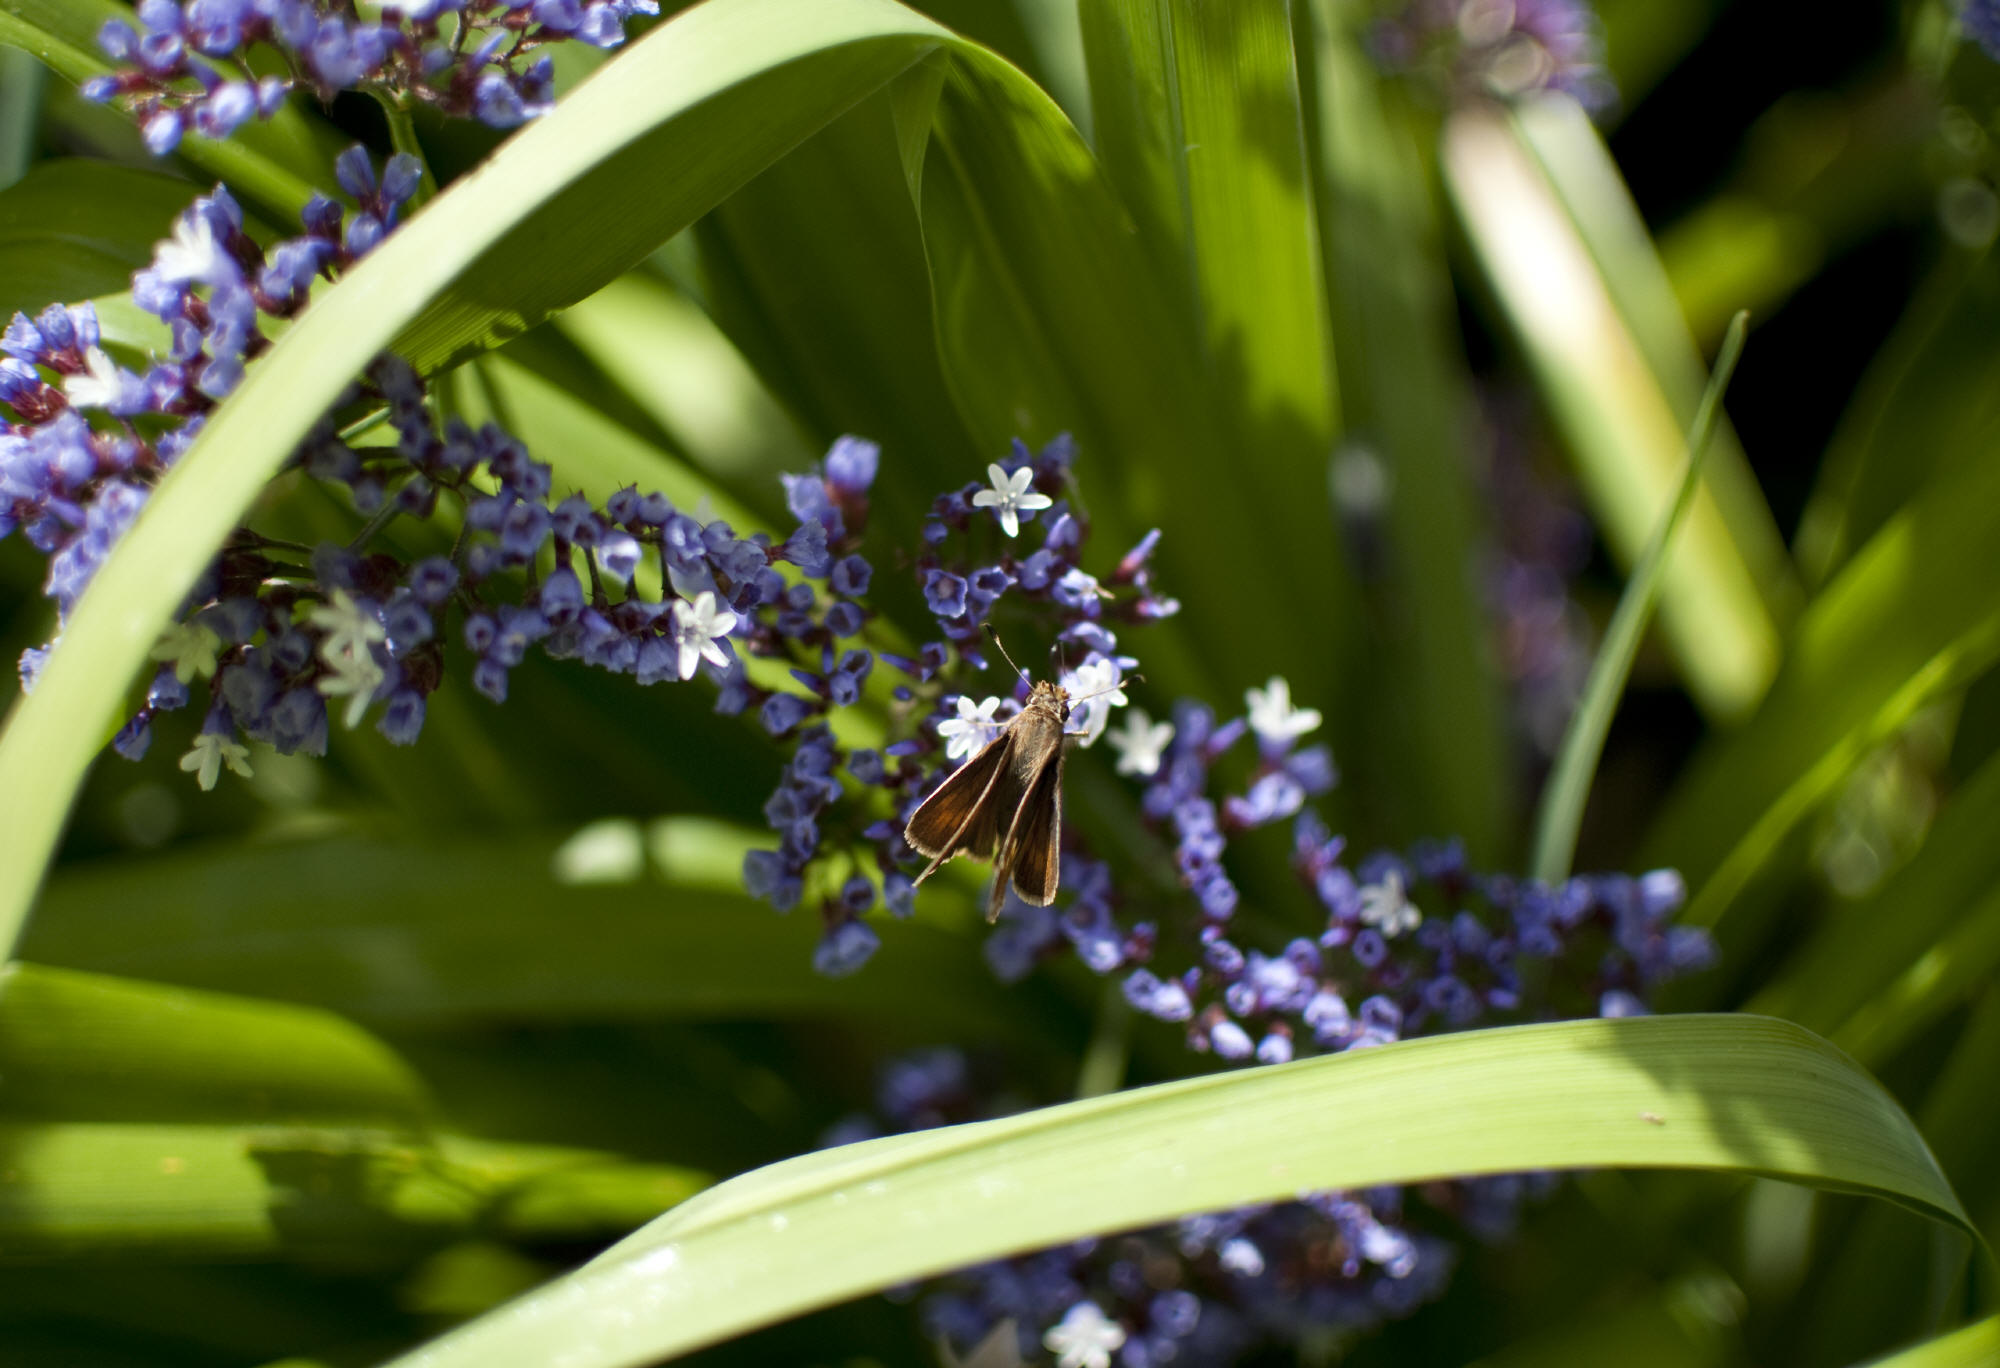
"Bug in the garden" Nature close-up unpolarized
Nikon D300 35mm f1.8 1/2500s ISO200 @.35m |
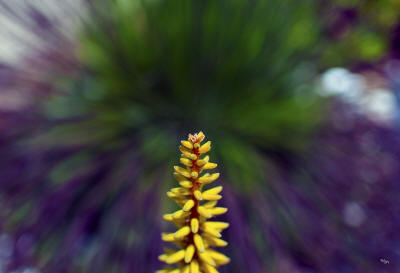
"Plant burst" Shallow depth of field in nature
Nikon D300 35mm f1.8 1/2500s ISO200 @.42m |
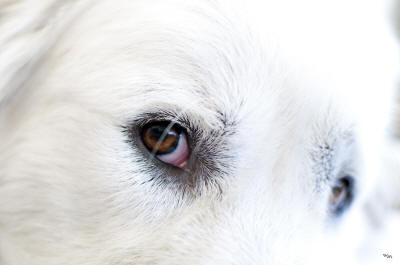
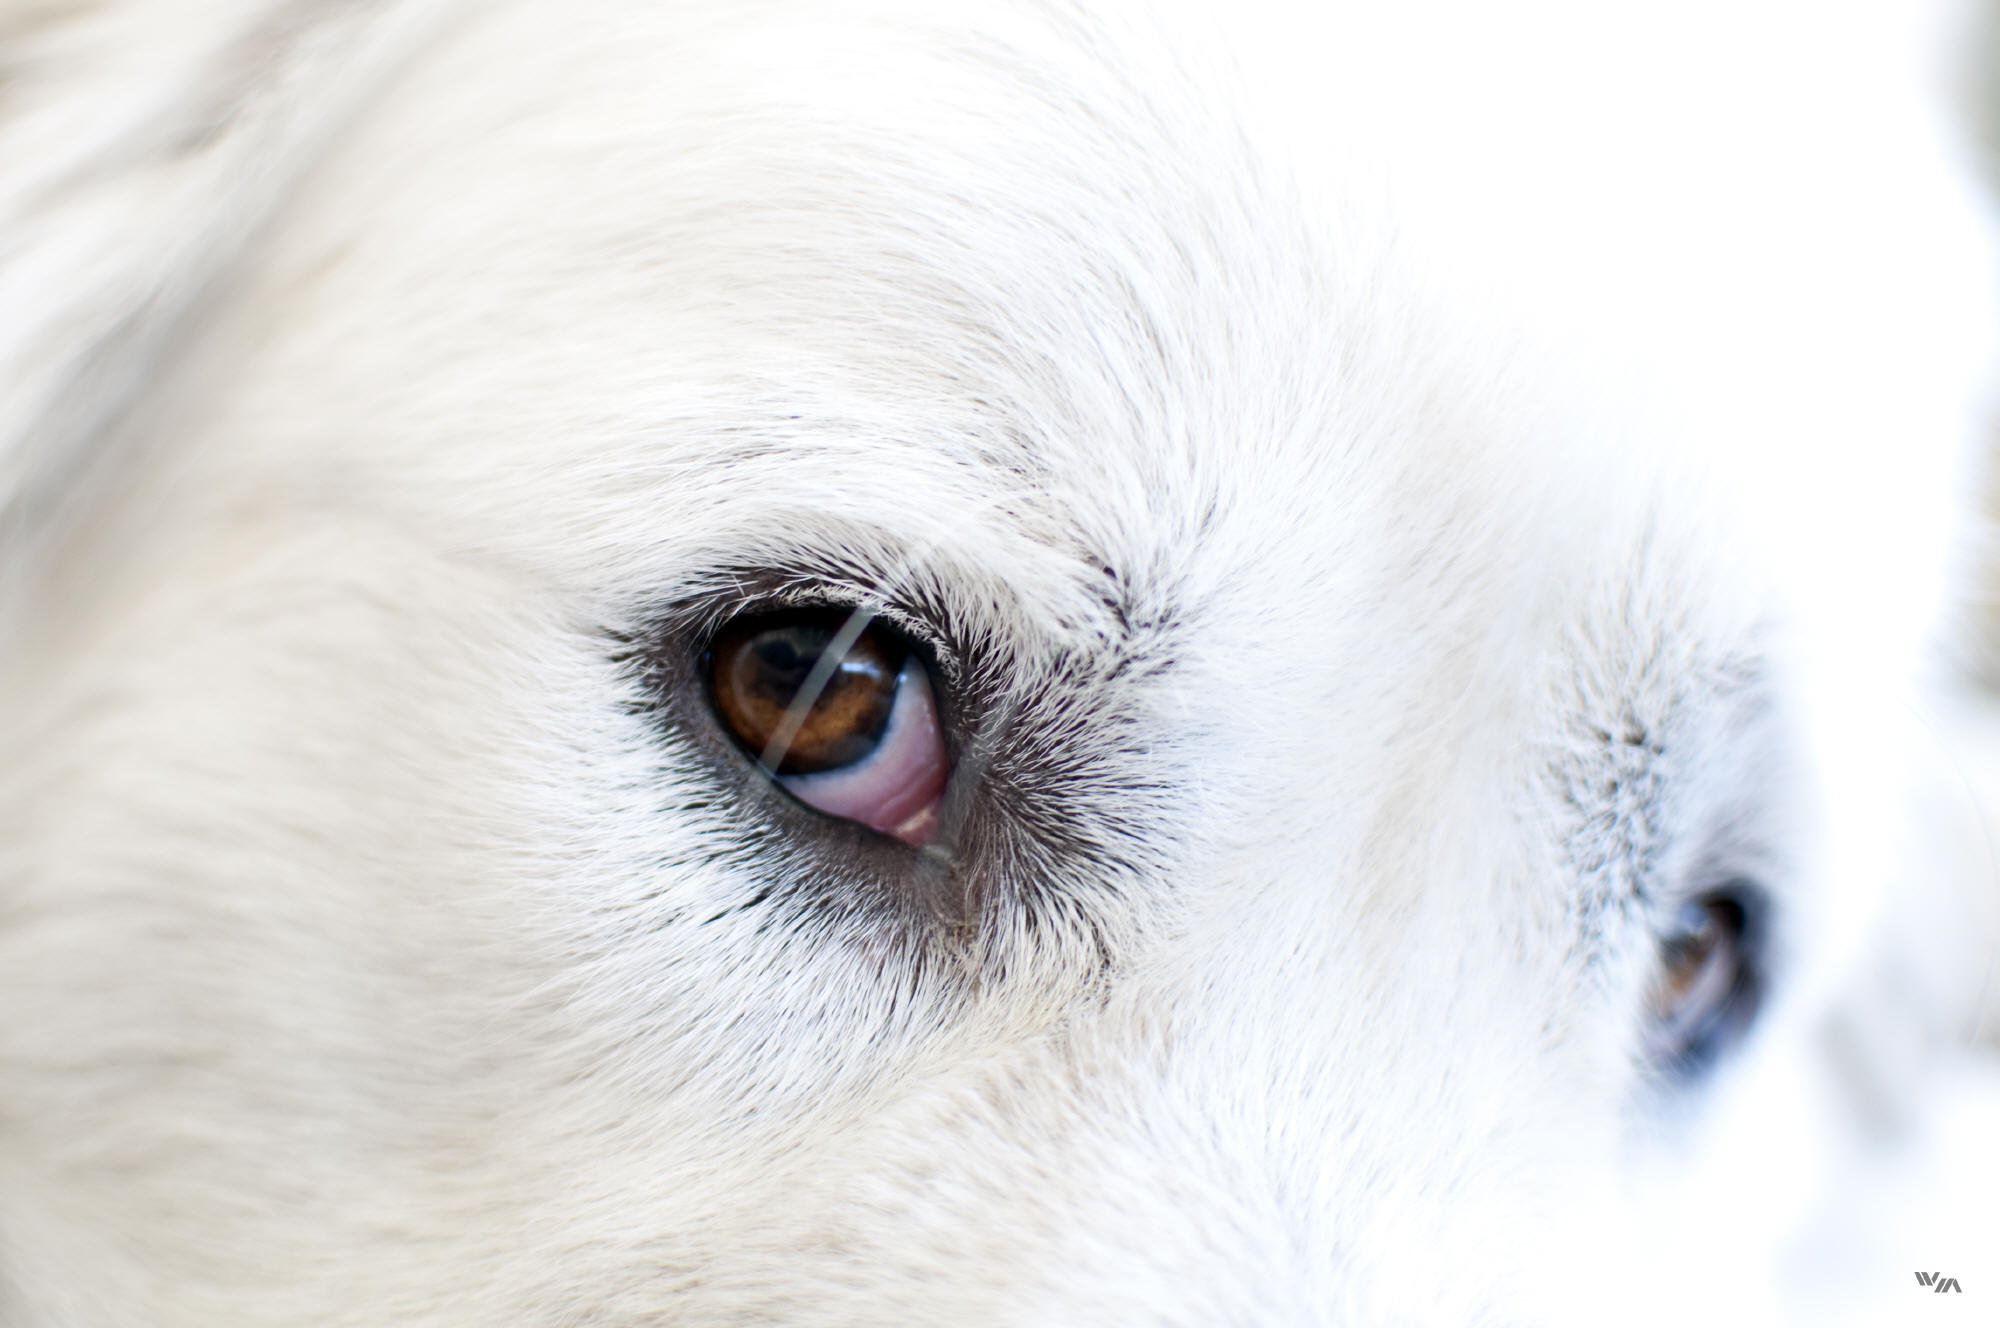
"Charlie's eyes" Wide aperture model
close-up
Nikon D300 35mm f2.5 ISO200 1/50s @.3m |
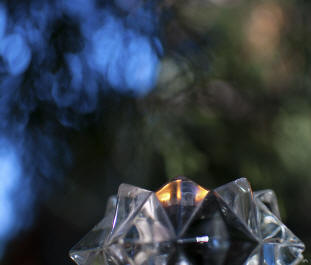
"Smoke & mirrors" Light far out of focus
looks like smoke
Nikon D300 35mm f1.8 ISO200 1/500s @.35m |
|
A camera's aperture
is analogous to the pupil of your eye - getting bigger to let in
more light and smaller to let in less. Aperture is confusing because of the way it is described in F numbers and F
stops. An F number is the ratio of the lens focal length to the
lens opening diameter, so a larger aperture corresponds to a
smaller F number. F stops are standard values of F numbers and
seem to be on a weird numbered scale until you dredge up your
old geometry formulas and realize that's because they are driven
by the area inside of a circle. F 1.4, 2, 2.8, 4, 5.6, 8 etc.,
are known as "full stop" increments, each representing one half
of the light transmitted of the previous one. Aperture is also a
driving force of "depth of field", which is the amount of the
picture that is in focus in front of and behind the camera's
single focus point. A smaller F number means a shallower depth
of field and a wider aperture. A larger F number means a deeper
depth of field and a narrower aperture. Yes, F numbers and F
stops make understanding aperture much more confusing than it
ever had to be. For visual examples, the four pictures above were
taken with a low F number (wide aperture / shallow depth of
field) to blur out everything but the main focal point while the
three pictures below were taken with higher F numbers (narrow
aperture / deep depth of field) to keep as much of the shot in
focus as possible.
|
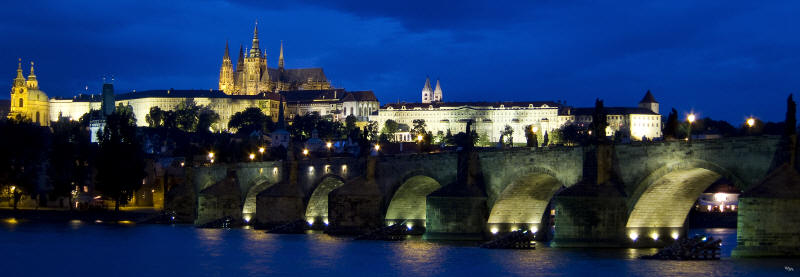
"Prague Castle & the Charles Bridge
panorama at dusk" Canon S90 11mm f4 ISO80 2.2s @65m |
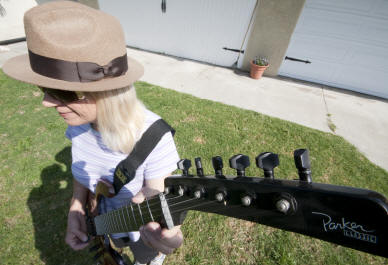
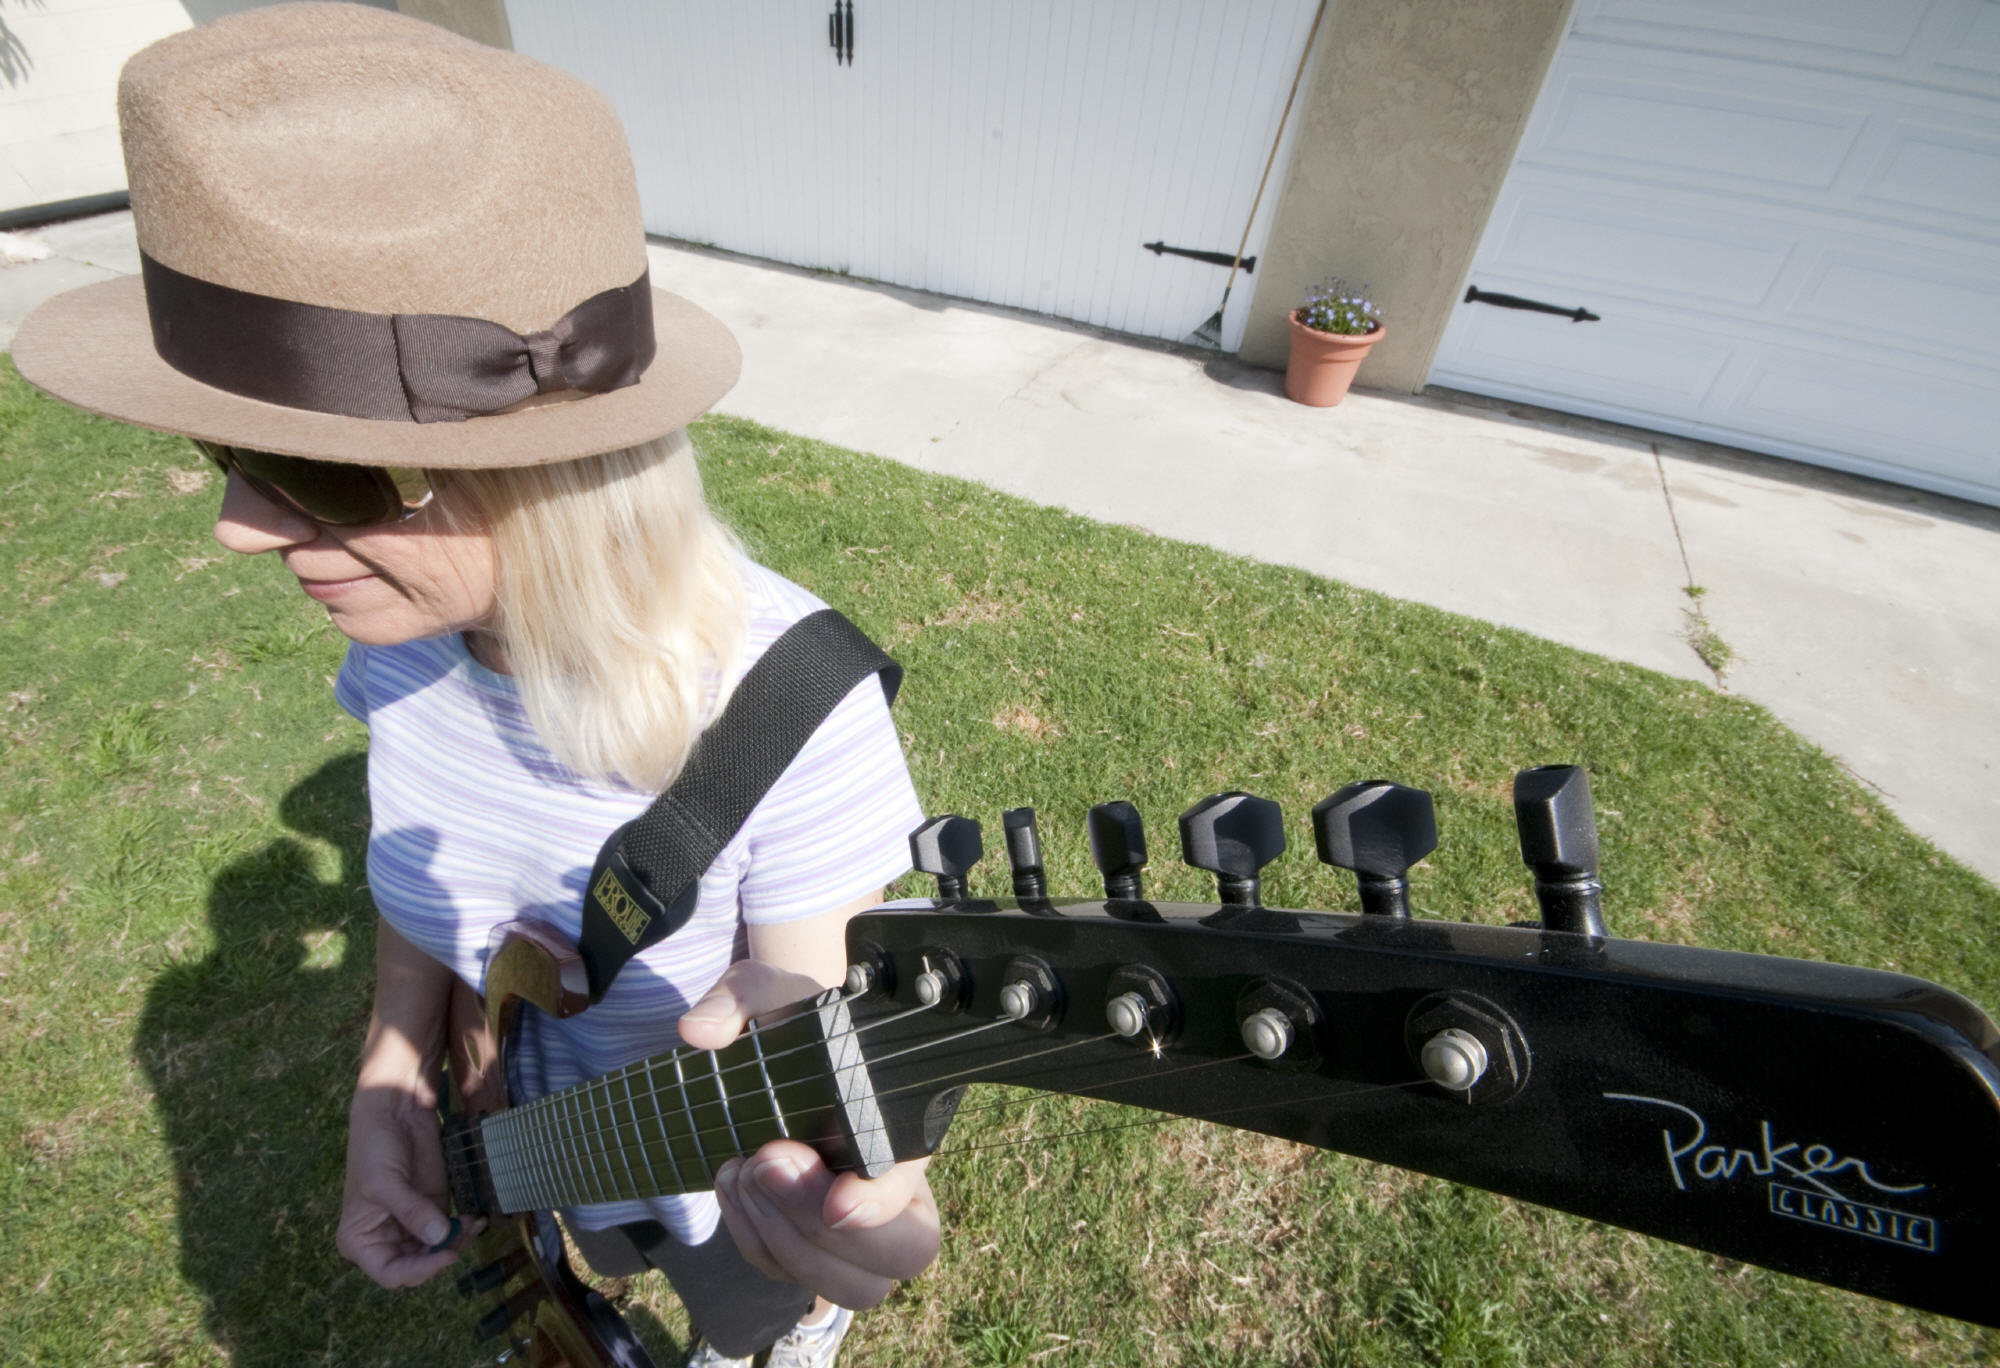
"Long neck guitar" Close wide angle perspective
Nikon D300 10mm f22 1/80s ISO320 @.25m |
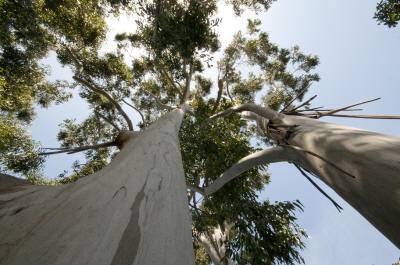
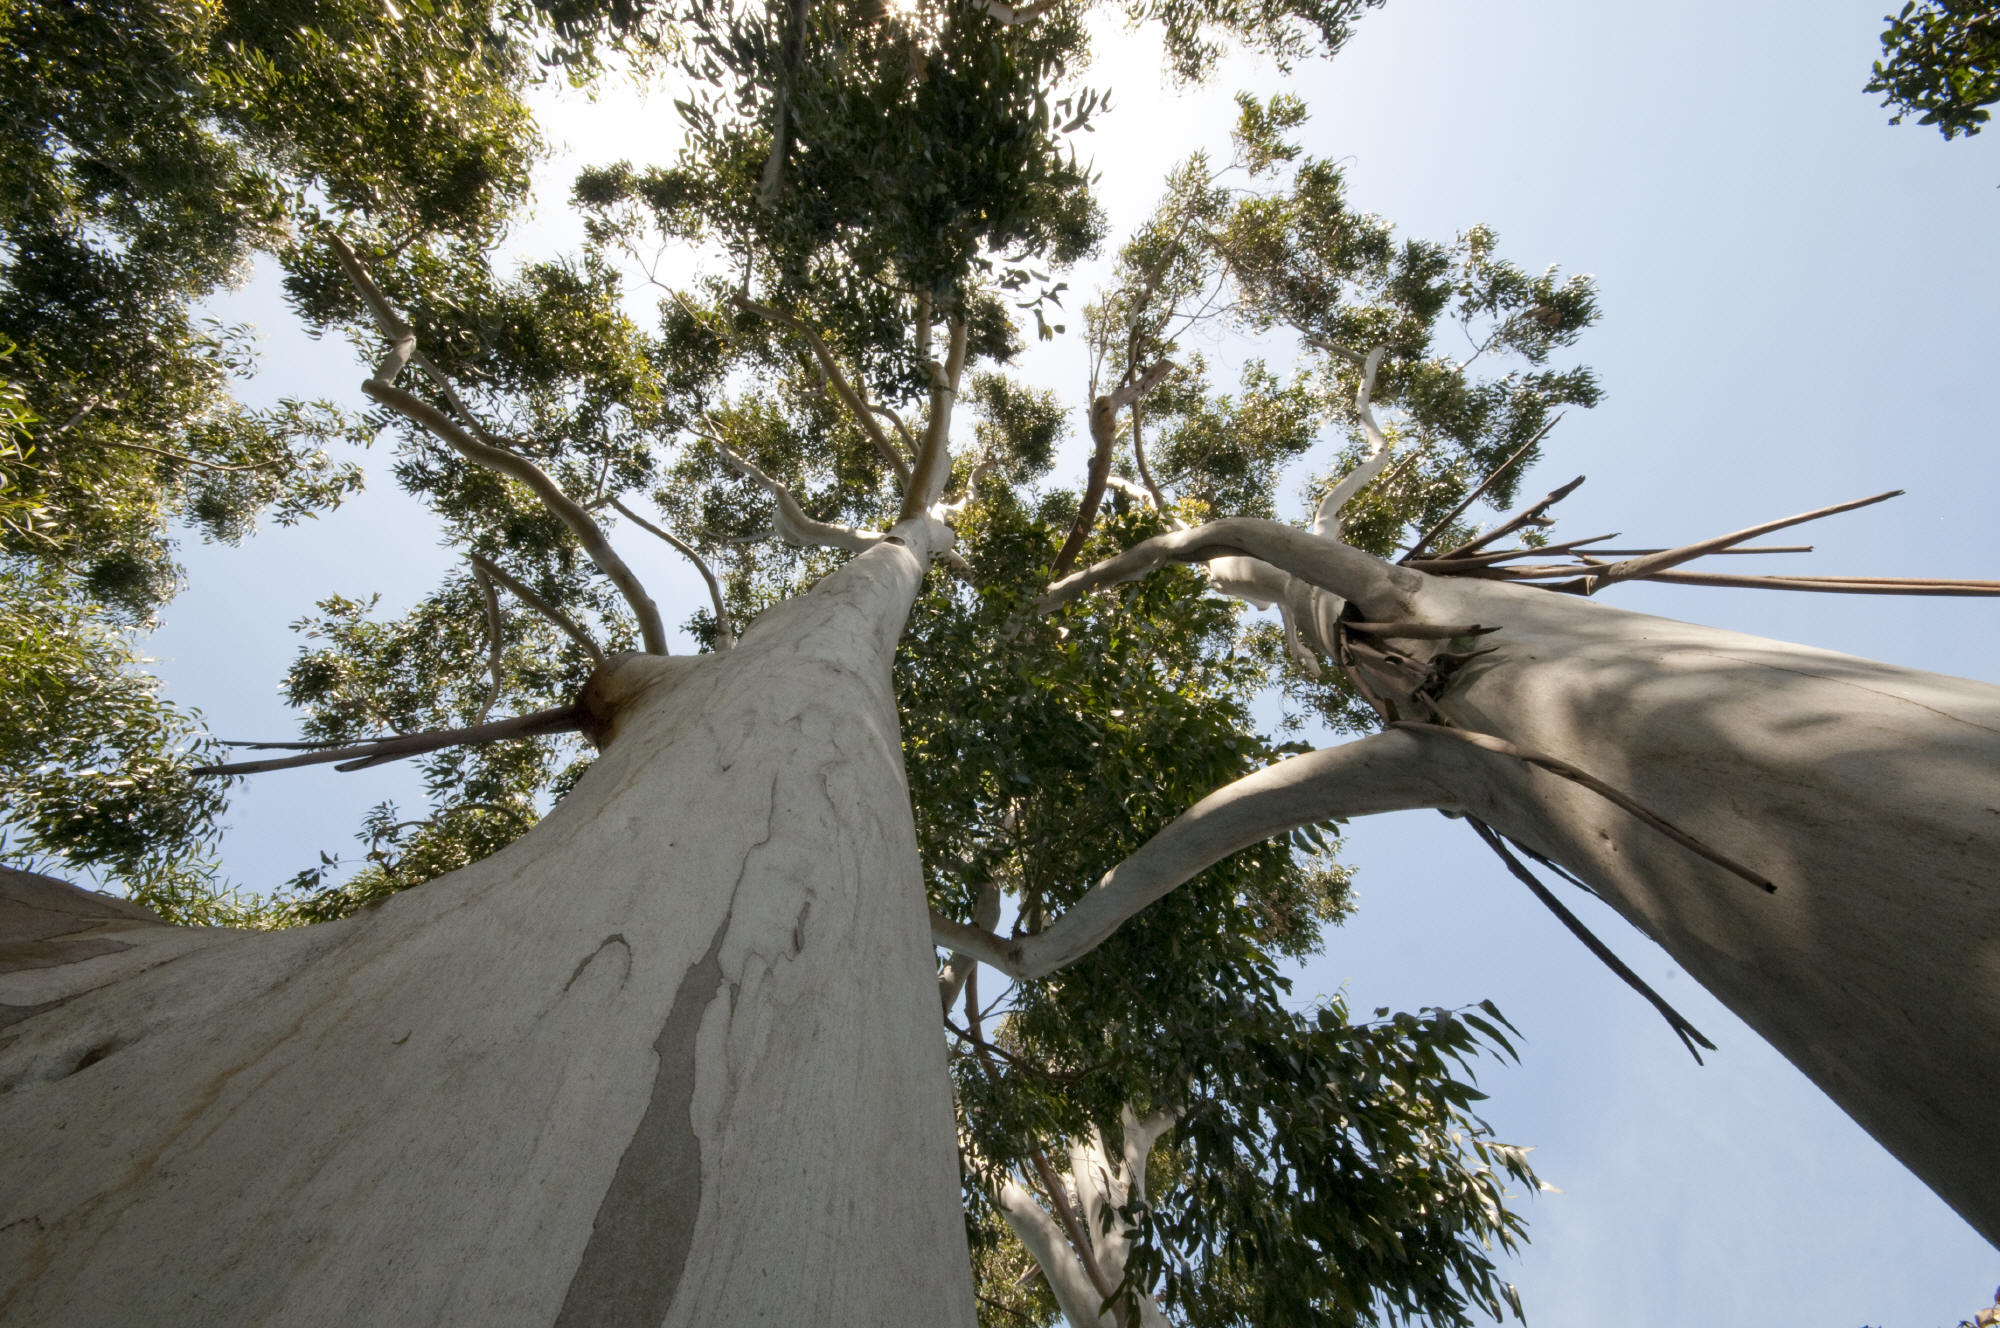
"Talking trees"
Ground up perspective
Nikon D300 11mm f25 1/80s ISO450 @.79m |
|
A camera's shutter speed
is much easier to understand. Press the button, the shutter
opens and a short time later it closes. Using shutter speed to
get a great shot is more challenging. A very short shutter speed
"freezes" action while a long shutter speed smoothes action. As
far as interactions go, given an equal amount of light
available, a quicker shutter speed will require a wider aperture
and vice versa. Very slow shutter speeds require the use of a
tripod because small movements of your hand holding the camera
will blur the image. If you have a steady hand, as a rule of
thumb any shutter speed slower than 1/(the lens focal length)
requires a tripod. So if I'm shooting with a 50mm lens, the
slowest shutter speed I can shoot handheld is 1/50 second.
Optically stabilized lenses or cameras give handheld shooting a
useful lift. The two pictures below, "ASU
fountain at night" and "Fountain drips", illustrate the effects
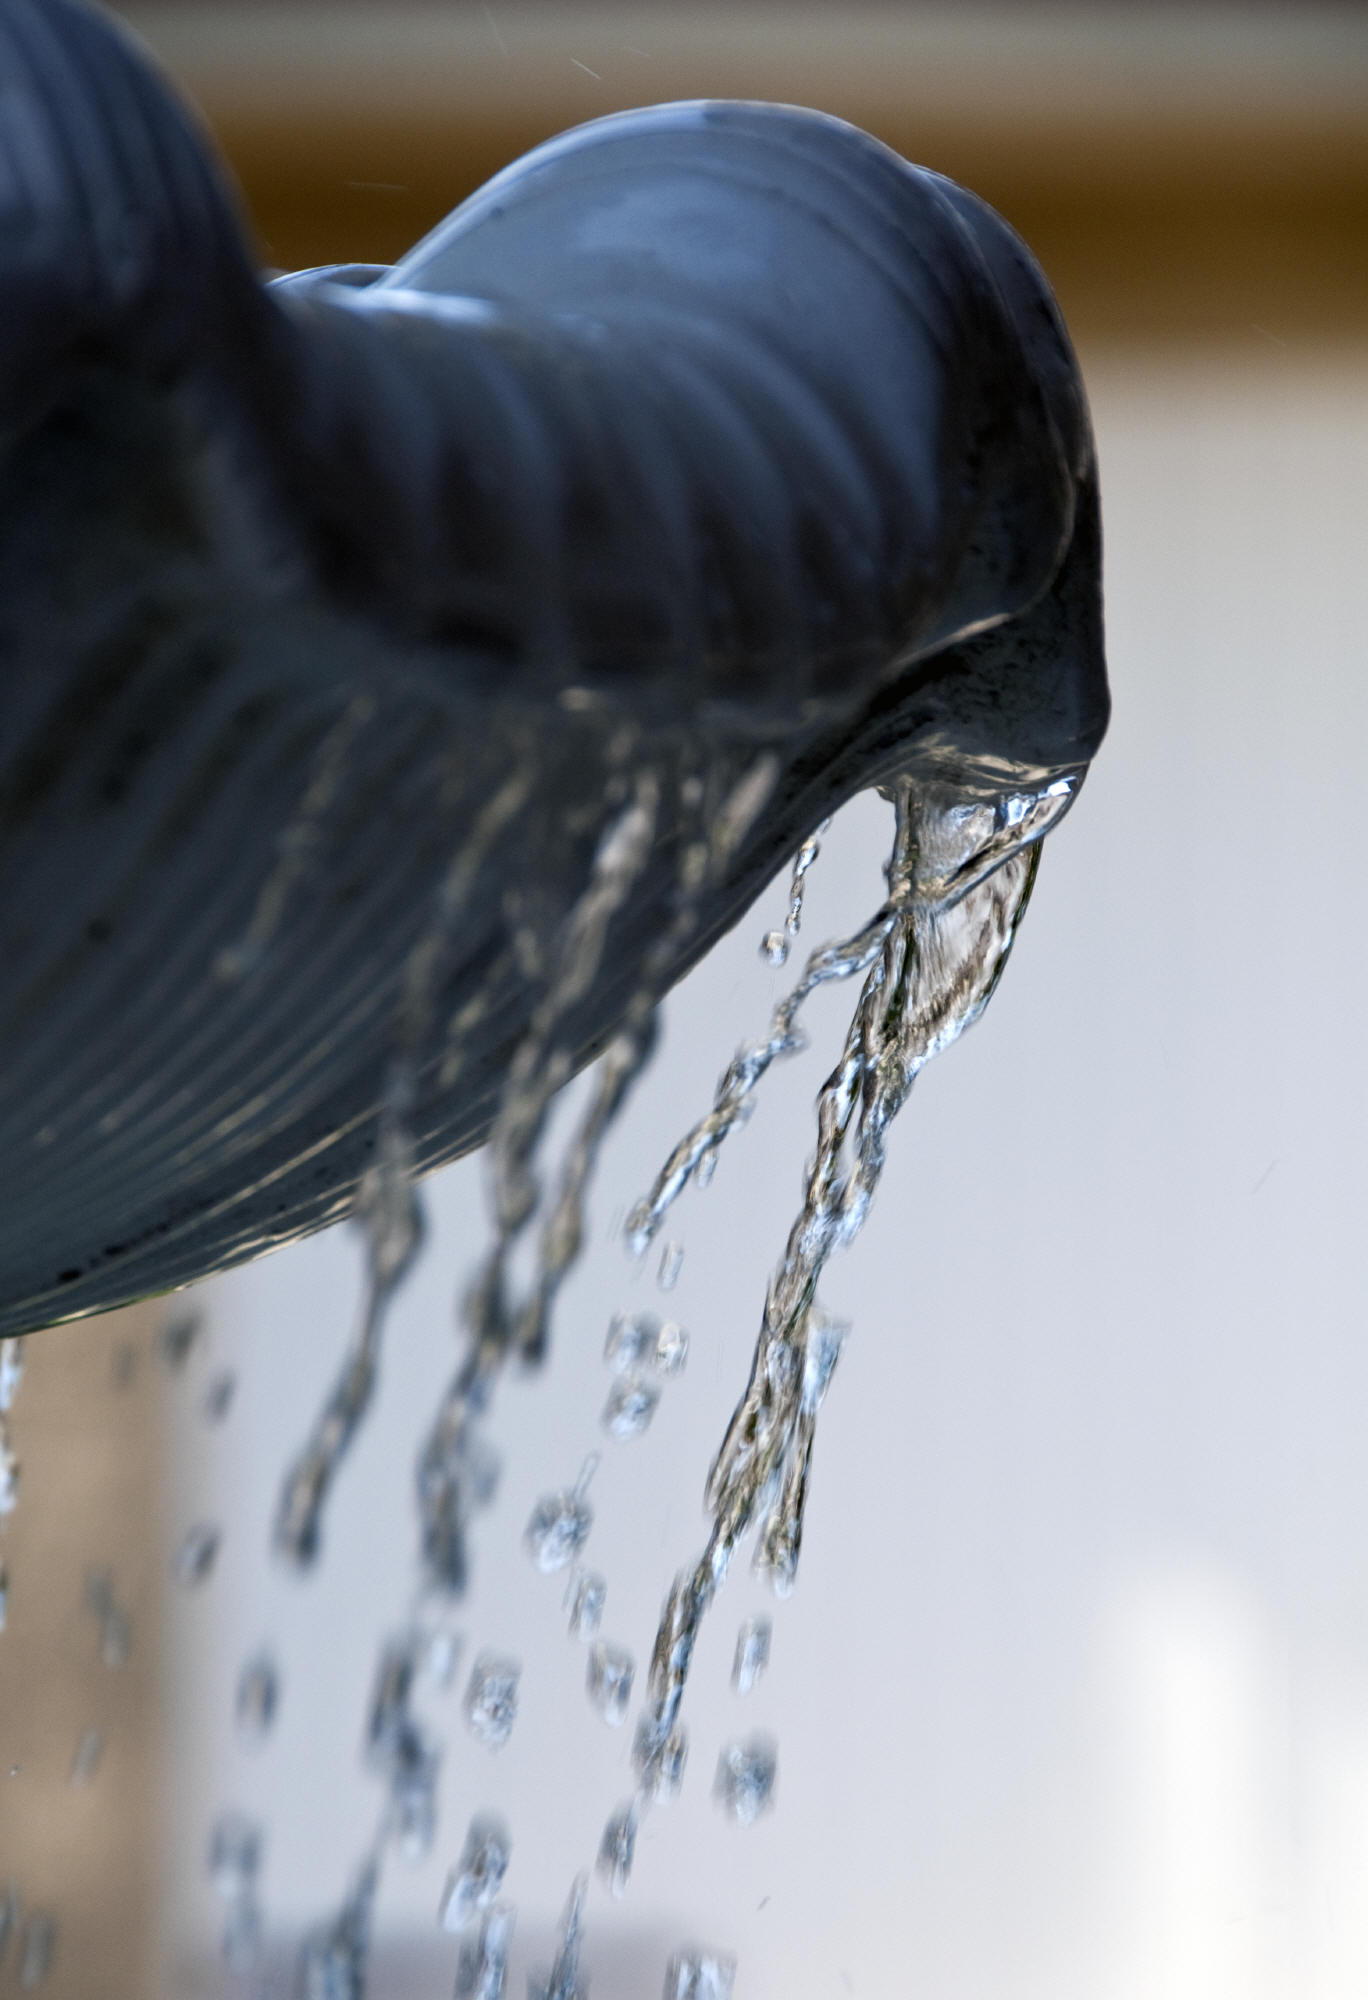
of a very long and a short shutter speed. To force a wider
aperture for that silky waterfall effect (below left) when the
ambient light is high, like mid-day, use a neutral density
filter of optical density .9 (ND8) or 1.2 (ND16) that lets in
only 12.5% or 6.25% of the light respectively.
|
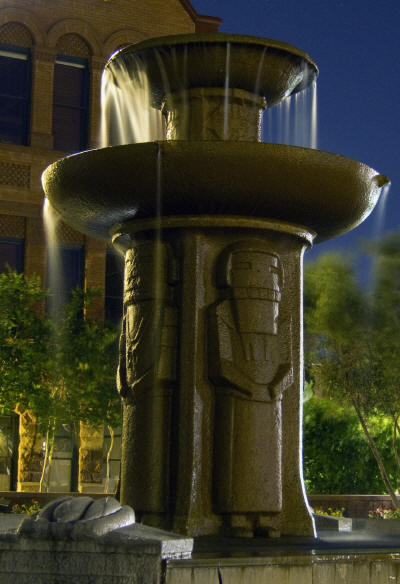
"ASU fountain at night"
Slow shutter water smoothing
Canon S90 11mm f3.2 10s ISO160 EV+.7 @5.8m |

"Fountain drips"
Fast shutter water stop action
Nikon D300 200mm f8 1/250s ISO200 @1.7m |
|
A camera's ISO
sensitivity is very straightforward. Digital cameras
have an optimal sensitivity setting based on the electronics and
mechanics of their sensor. My Nikon D700 and D300 are best at ISO 200
while my Canon S90, Nikon D800E and most other digital cameras are best at
ISO 100. The most important thing to remember about ISO is to
keep it as low as practical, because higher ISO settings
increase "noise", which is the grainy pattern that shows up in
photo details. Better cameras with larger sensors have a higher tolerance for
high ISOs. My D300 takes acceptable pictures set as high as
ISO1600 while my D800E takes acceptable pictures all the way up
to ISO6400. Unless driven by a particular effect I'm going for, I
keep the ISO setting at the optimal number and use aperture and
shutter speed to regulate light. To do that, I set the "auto
ISO" setting to manual or to strict high level limits. I float the ISO up only when
the widest aperture coupled with the longest shutter speed won't
do the job. |

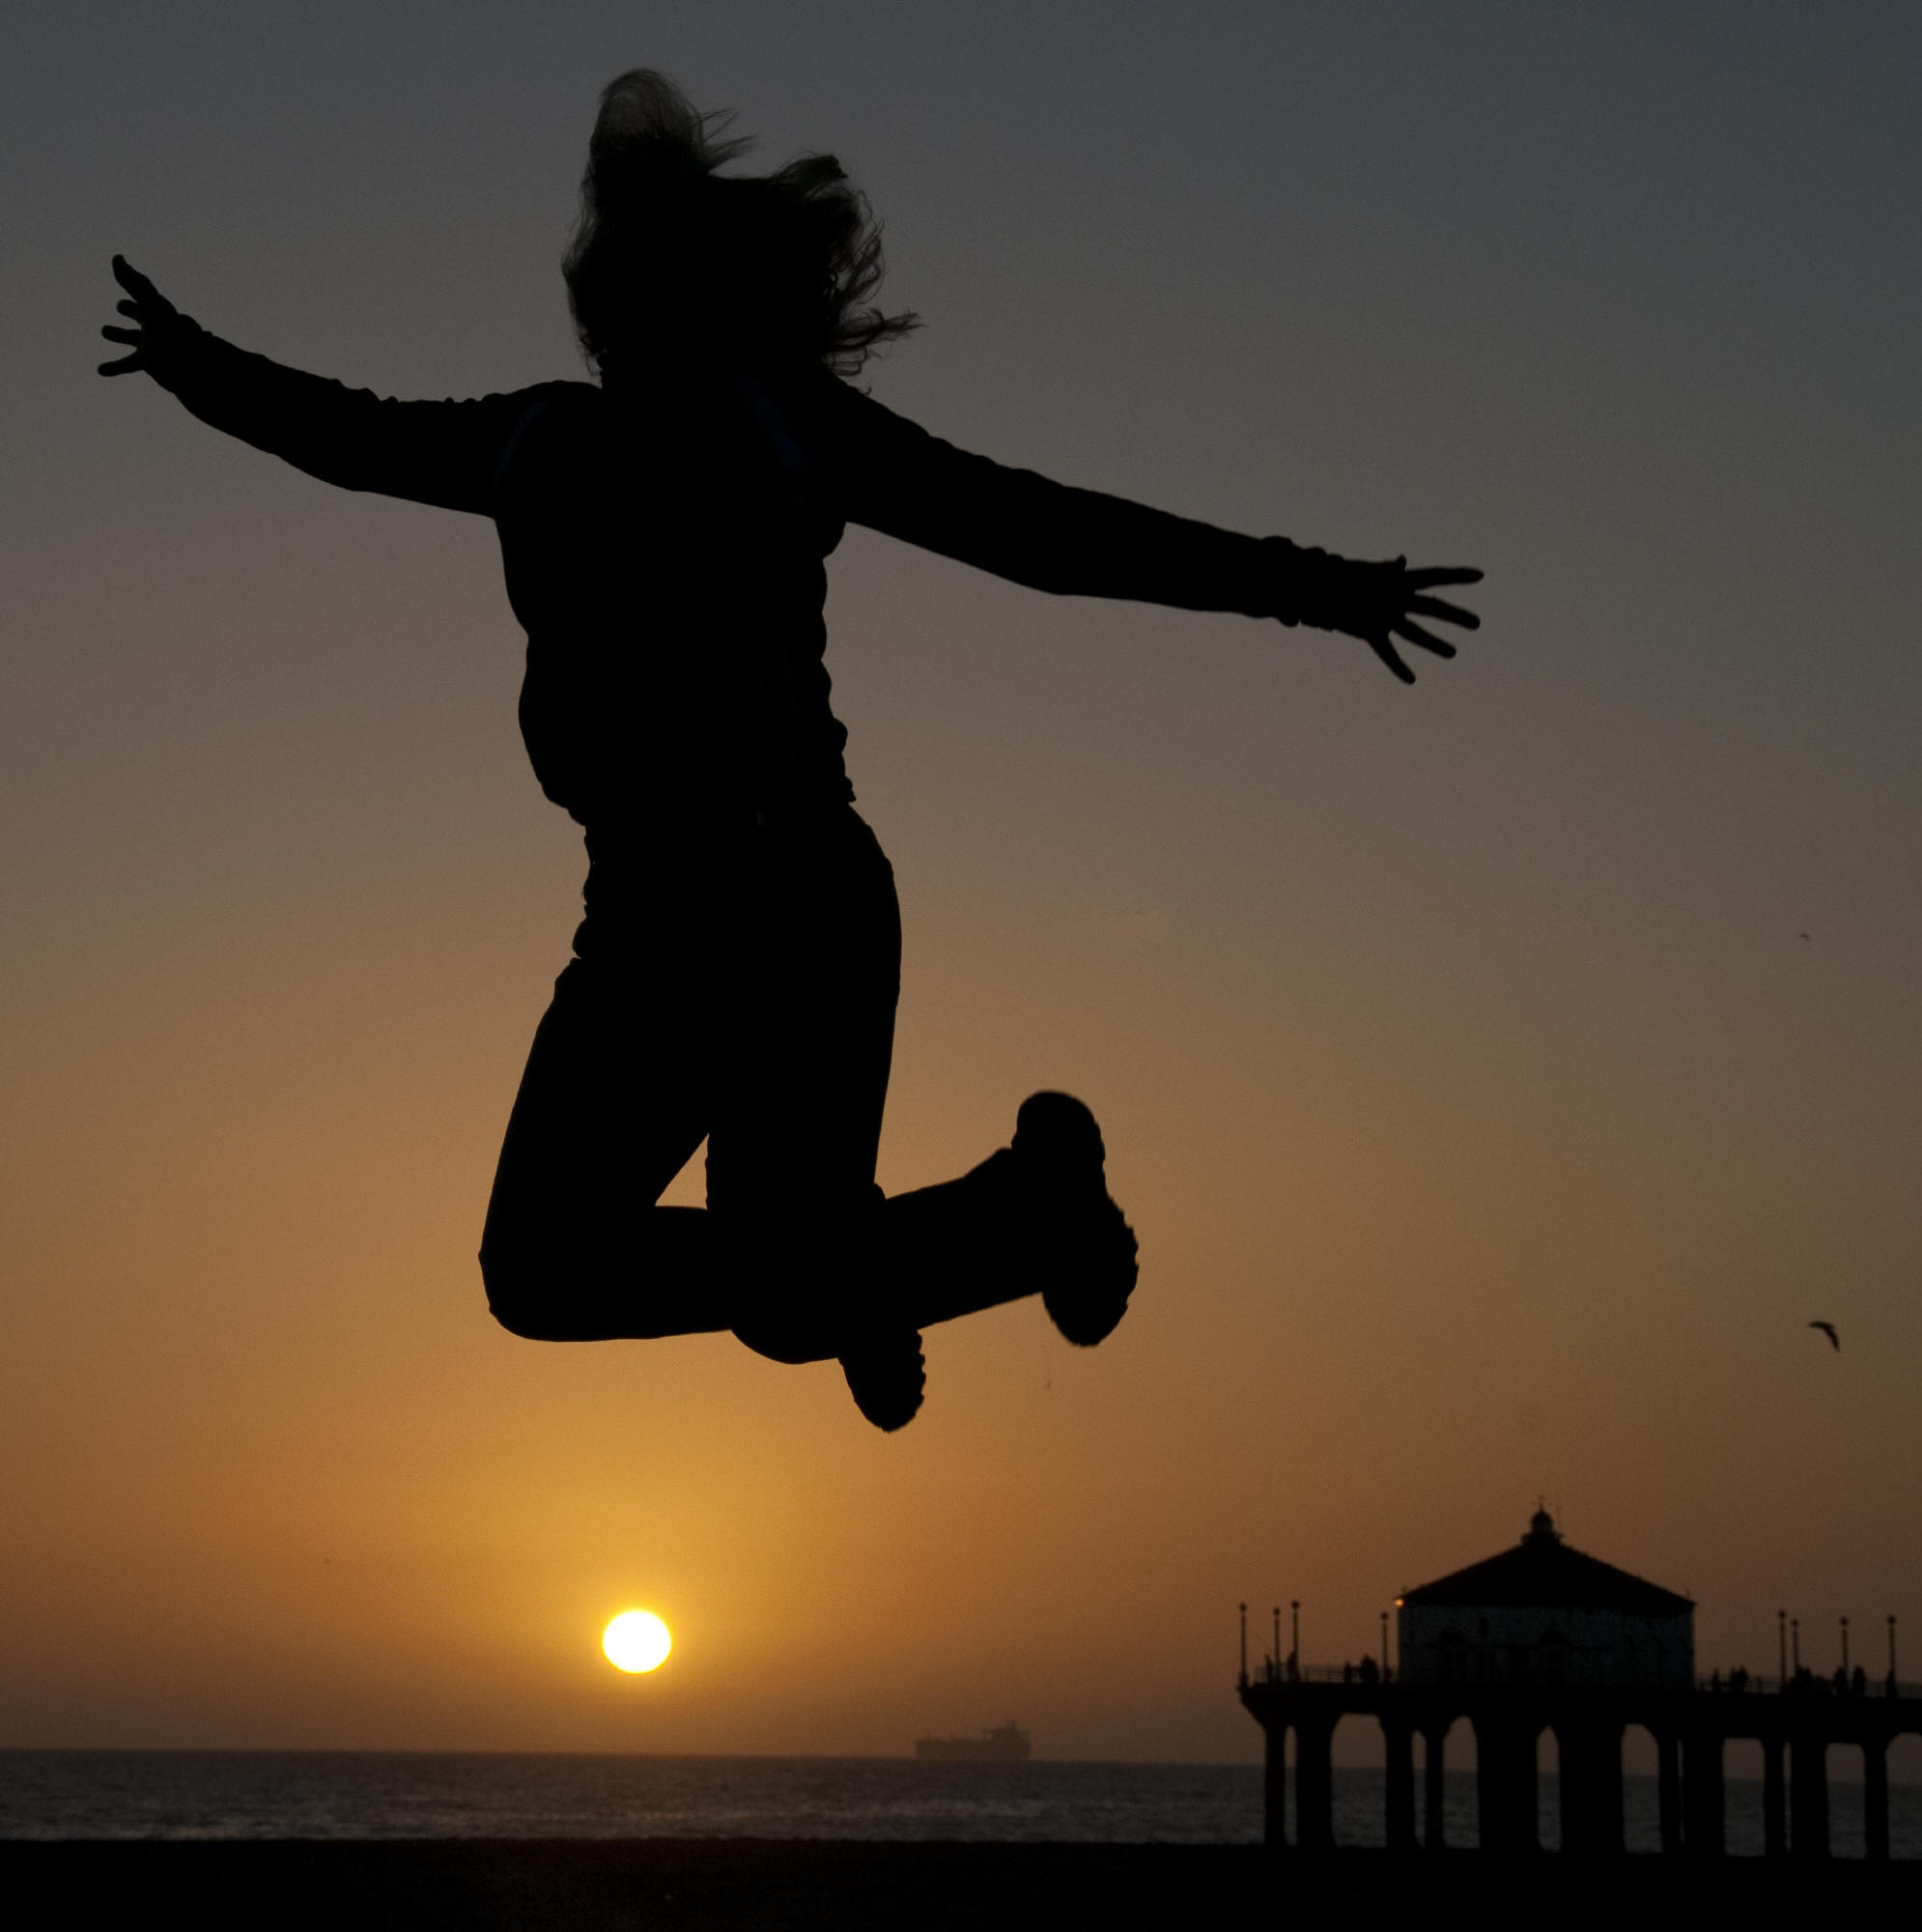
"Over the pier"
Jumping sunset silhouette
Nikon D300 55mm f13 1/640s ISO200 @6m |
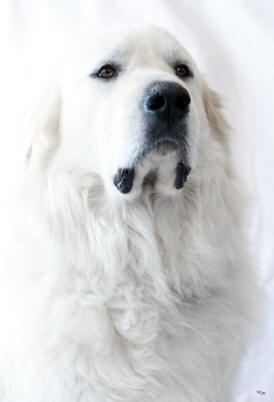
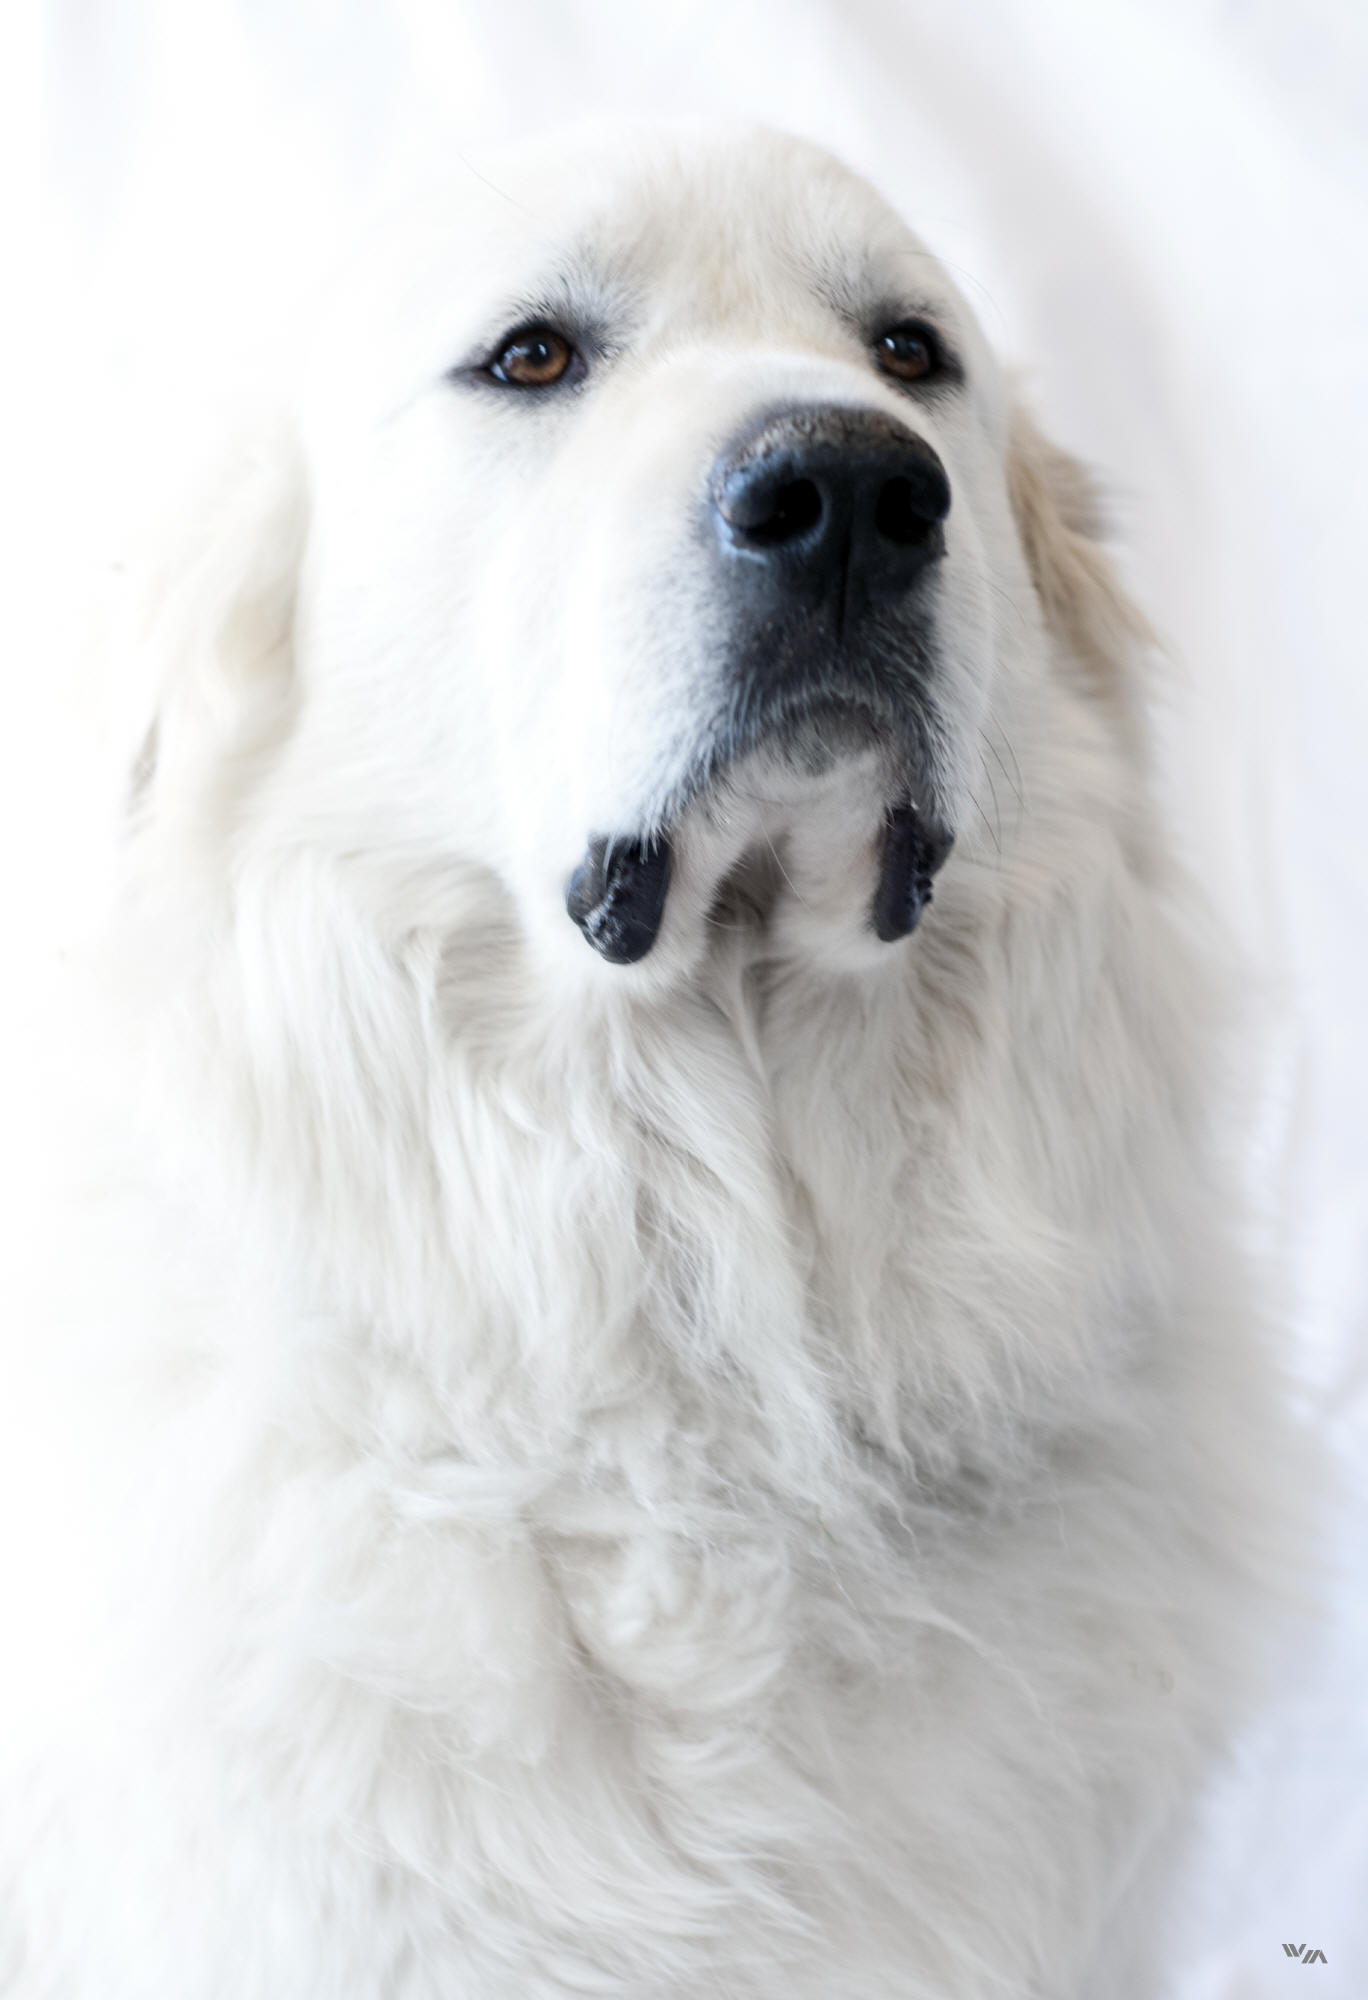
"Charlie on white"
High key lighting
Nikon D300 50mm f3.5 1/50s ISO200 EV+1 @1m |
|
Getting the right perspective
Perspective is the next hurdle to getting a great
shot. Perspective has many elements including framing, running lines out of
corners and applying the "rule of thirds". Proper framing is
often the difference between a boring shot and an interesting
one. In western cultures, our eyes follow pictures the way they
read books, from upper left to lower right. We also tend to see
the brightest spot in a picture first. A picture that tells an
interesting
story generally doesn't fight this directional tendency and rarely will have
its main subject parked alone in its center. Another very simple
perspective method I learned is that if there are straight
lines in the frame that run from the near field to the far field,
better
pictures will run those lines out of the corners. The
"rule of
thirds" is a simple perspective approach to better place key
objects in the shot. Imagine a stretched tic-tac-toe board
superimposed over the shot dividing the frame into thirds in
vertical and horizontal directions. Major lines of the subject
should be along any of those those tic-tac-toe lines and major
points should be at their intersection.
Perspective is also effected by lens type. A simple way to think
about it is that given the same distance from a subject, a wide
angle lens will exaggerate distances between subject elements
while a telephoto lens will compress them. "Long neck guitar"
and "Talking trees" shots earlier on this page illustrate using
a wide angle lens to exaggerate subject distance, while "Over
the pier" above illustrates compressing subject distances
together. A common wide angle lens mistake is to use its wide
angle trying to get more into the frame. Wide angle lenses are
much better applied to getting very close to a subject,
including the rest of the picture in perspective to it. There's
much more to perspective, but following just these basic
concepts makes a significant difference.
Going into the light
Playing with light is a
photographer's game. The first picture above is called a jumping
sunset silhouette, demonstrating that even at sunset as ambient
light fades, a quick shutter and a ground up perspective can
freeze a subject and give an interesting effect. I took this
shot, "Over the pier", laying on the sand pointing the
camera up with my model about 20 feet away jumping up about 18 inches. High key lighting is a lighting effect where
subject and space are defined by the lack of light
rather than its presence. The second picture above, "Charlie on
white" defines Charlie (my Great Pyrenees) only by
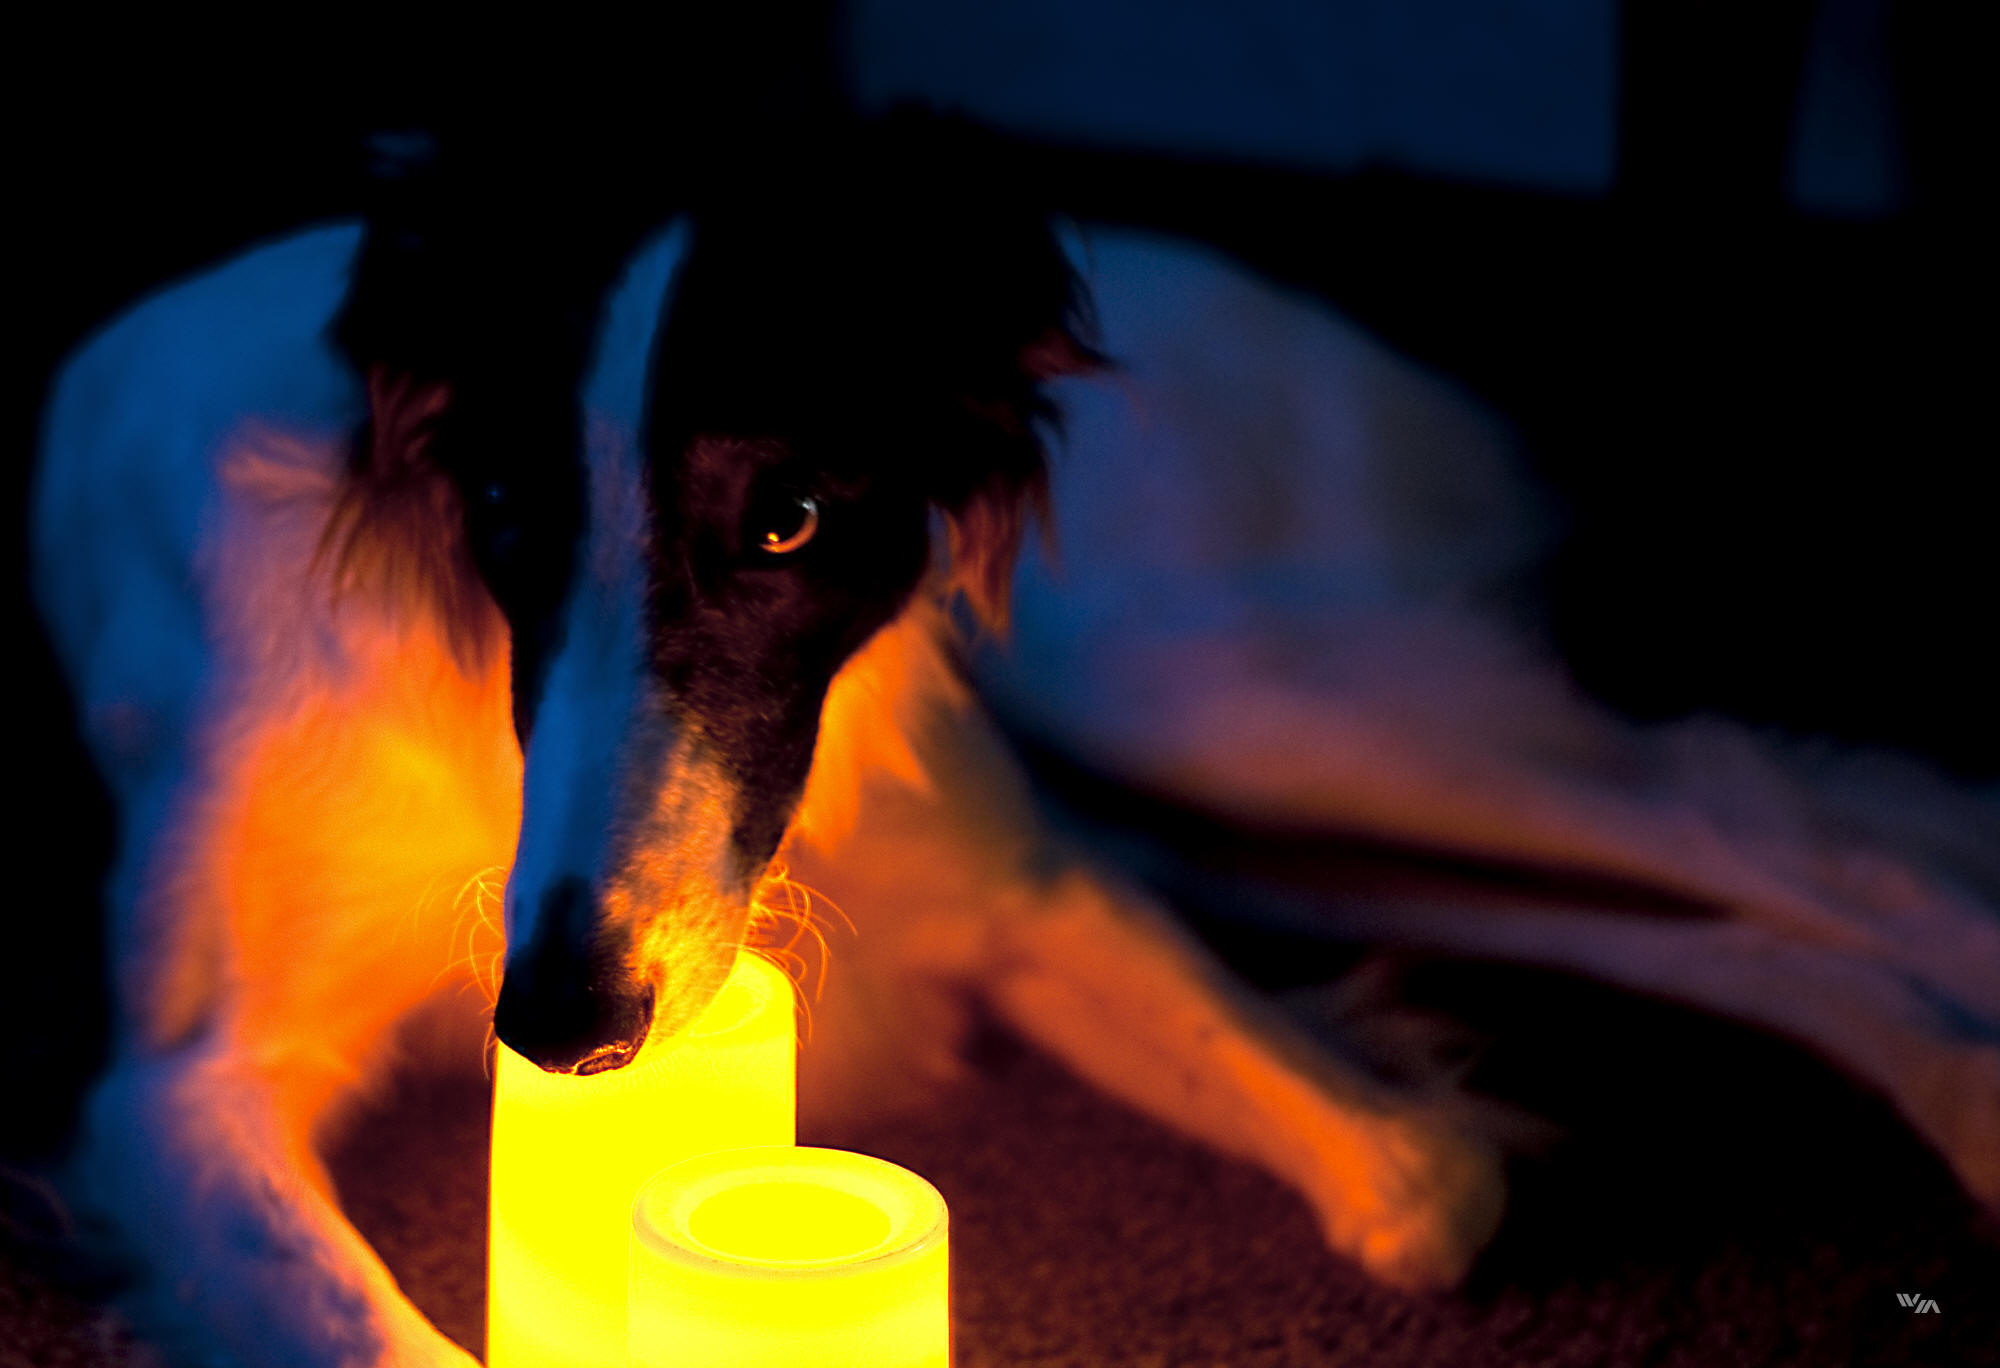
his black nose, eyes and lips. At the opposite end of high key
lighting is mood lighting where only part of the subject is lit
and shadows are long. "Leo's evil eye" below lights only a part
of Leo's (my Borzoi) body and the reflection in his
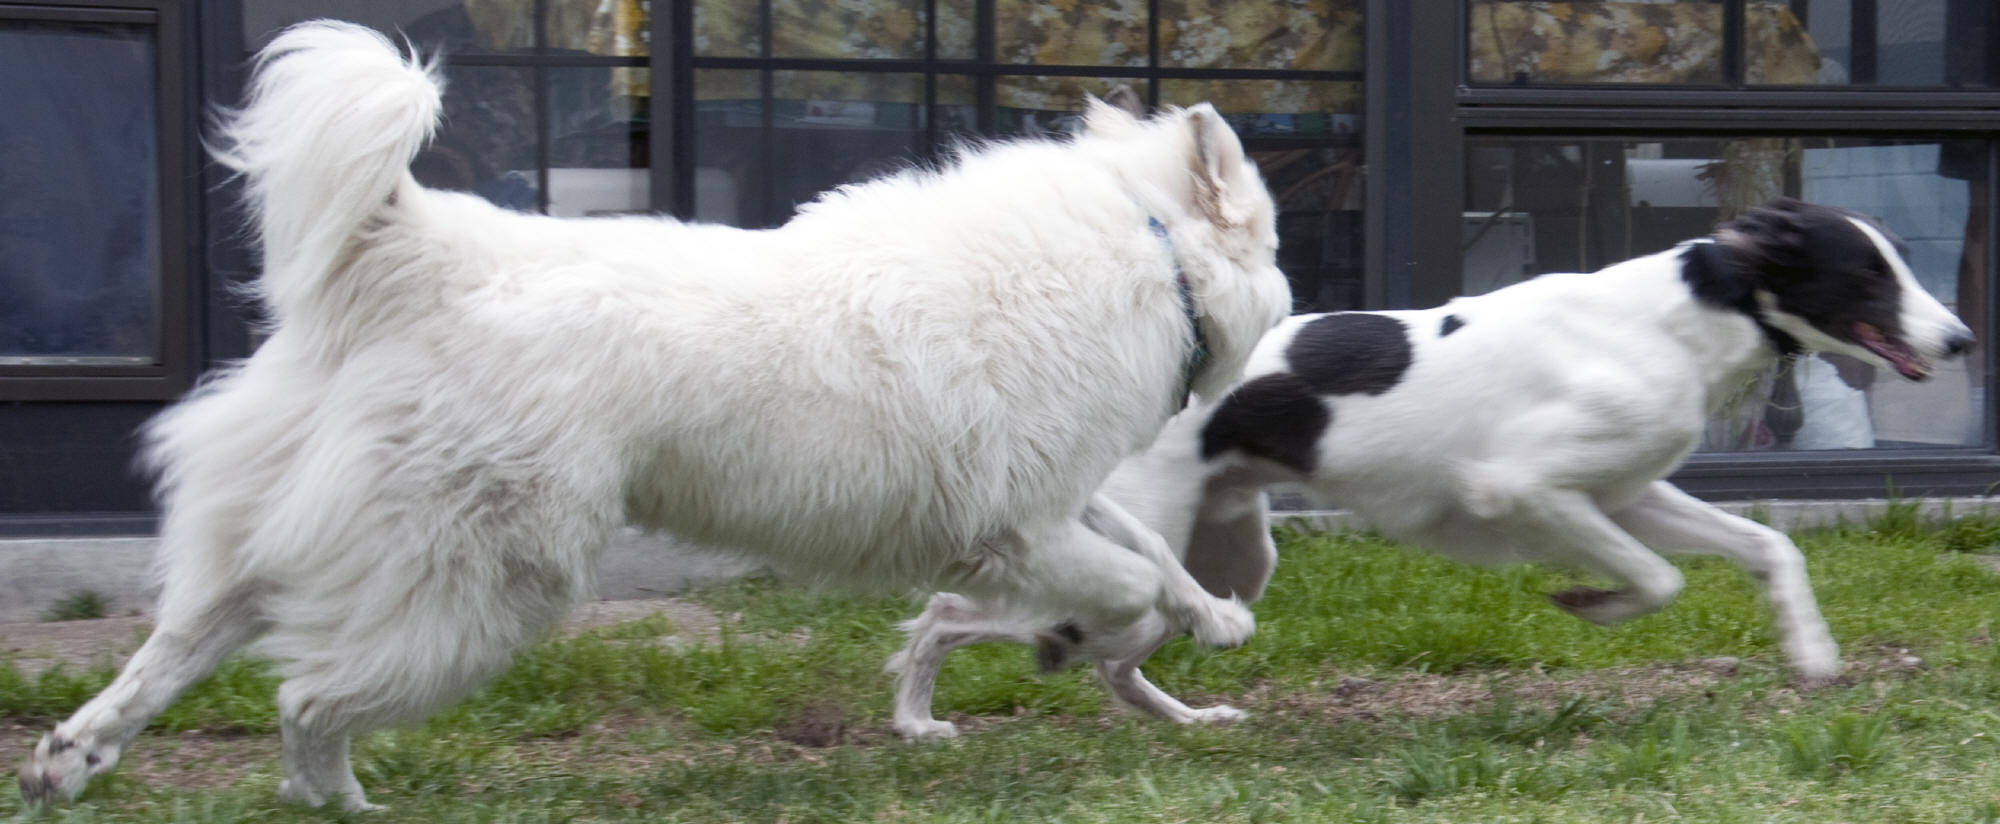
left eye from the candles sets the eerie overall tone. Panning
is a technique where the camera is moving at the speed of a
subject to freeze their motion but blur everything else. In
"Paws in the action" below, Charlie is moving at the same speed
that I'm turning the camera, while Leo is running faster and the
ground is stationary. Notice that both dogs have only
two paws on the ground, further conveying the feeling of speed.
A simple trick I learned in panning is to make sure to keep the
camera moving while pressing the shutter release.
|

"Leo's evil eye"
Mood lighting
Nikon D300 50mm f1.8 1/2s ISO200 EV-1 @1.5m |

"Paws in the action"
Panning
Nikon D300 46mm f9 1/320s ISO200 @6m |
|
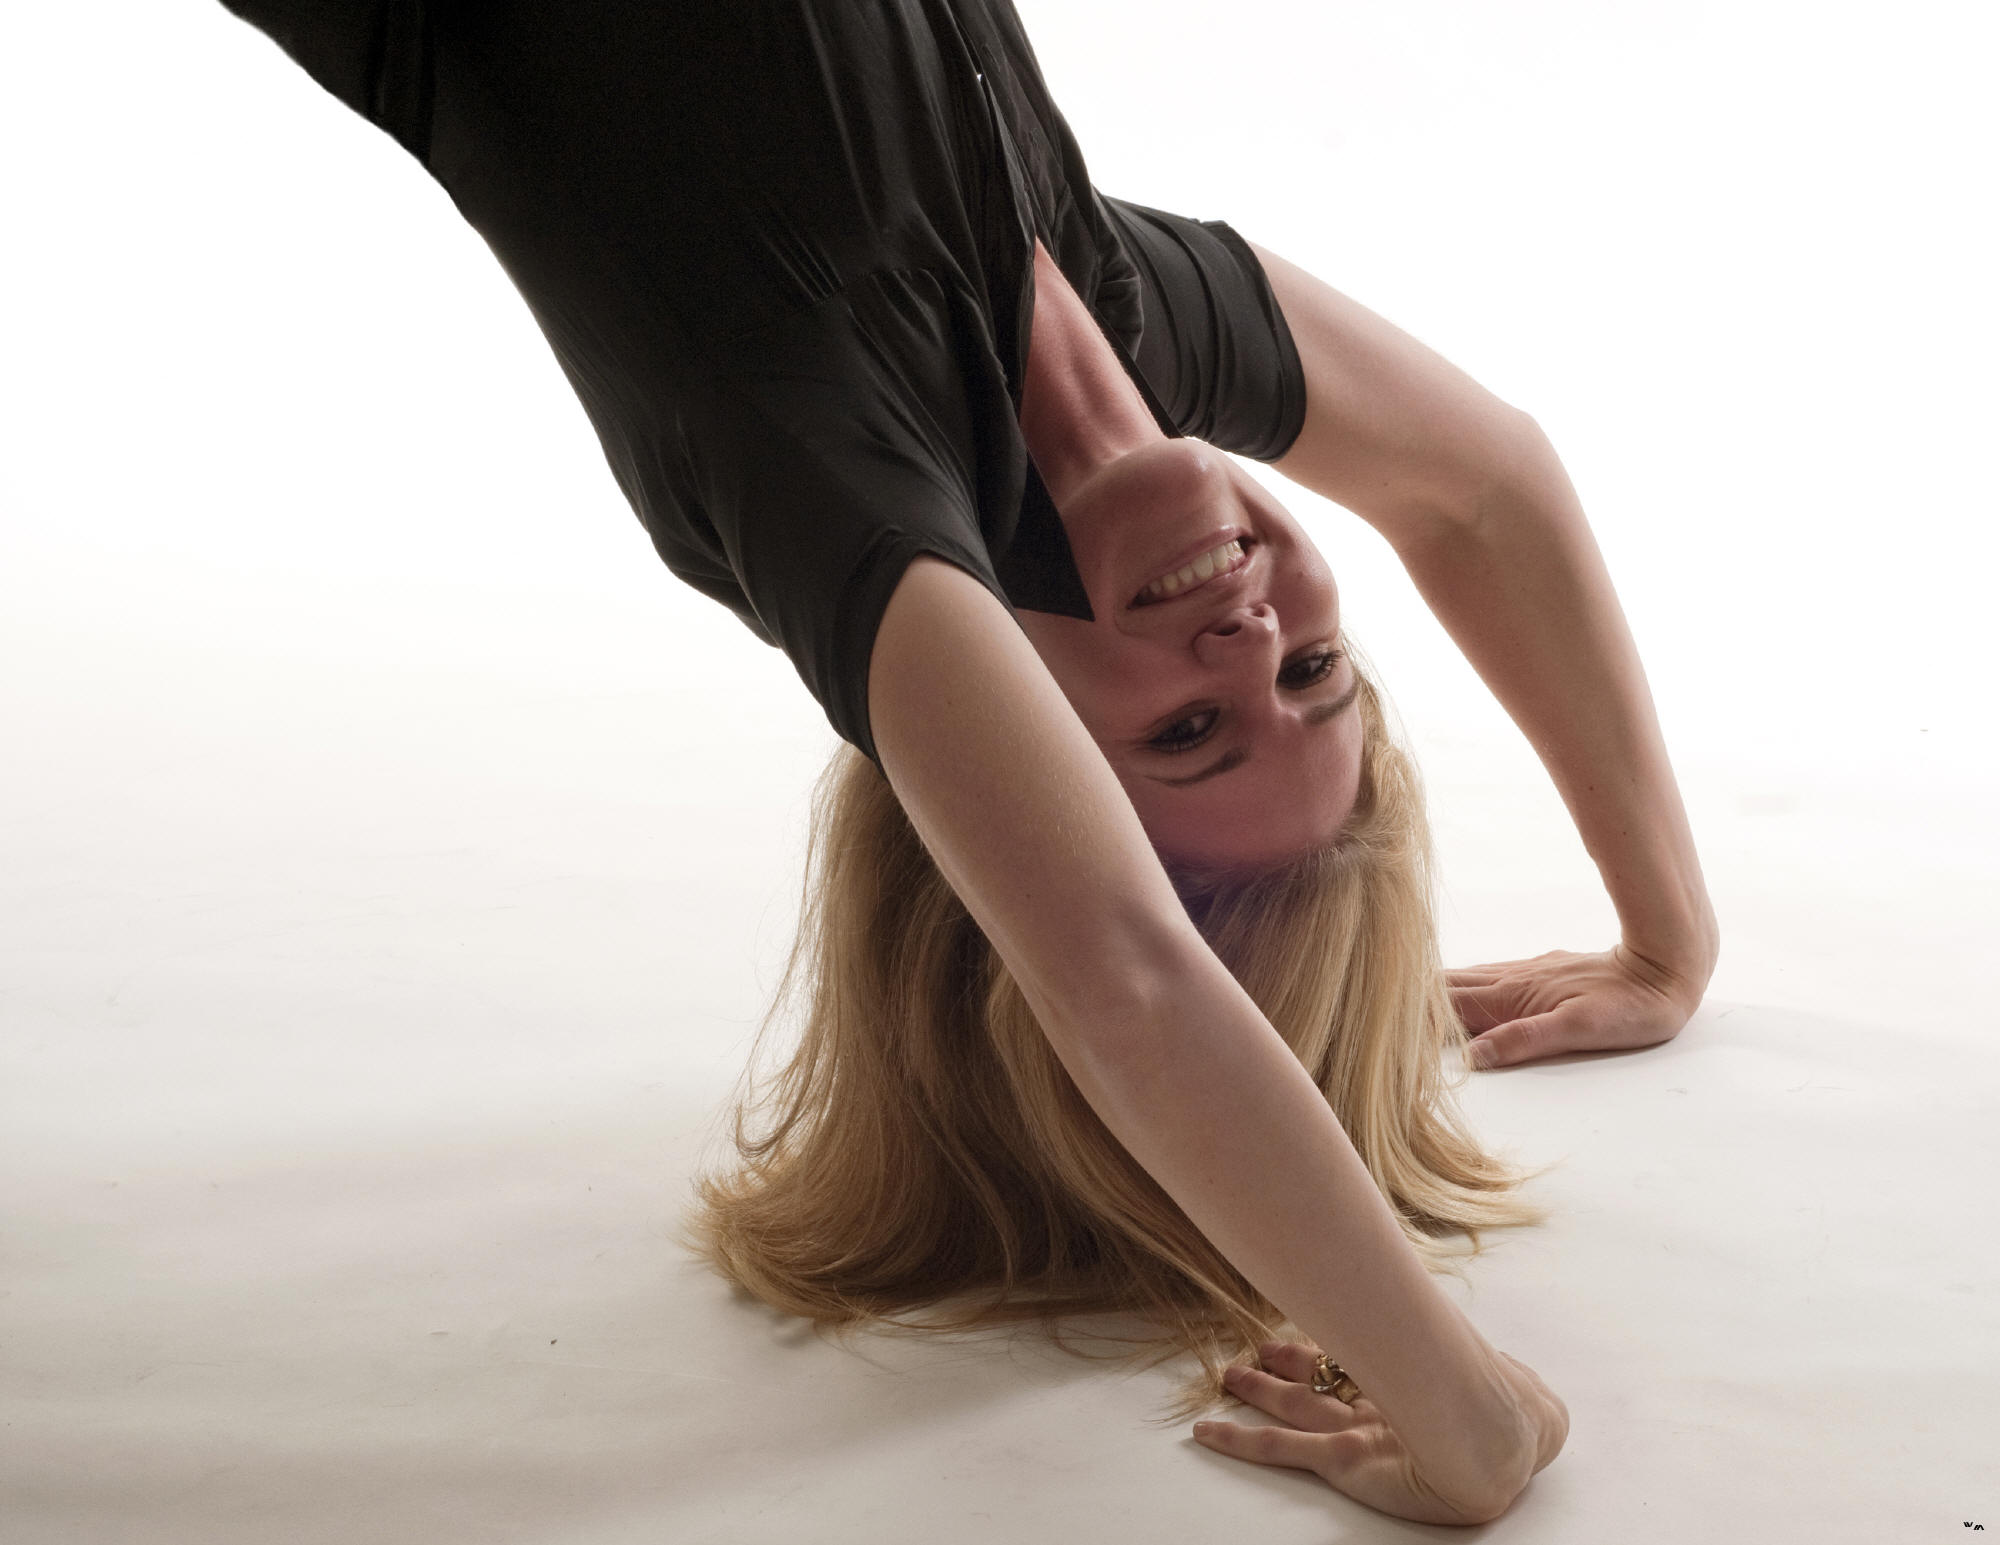
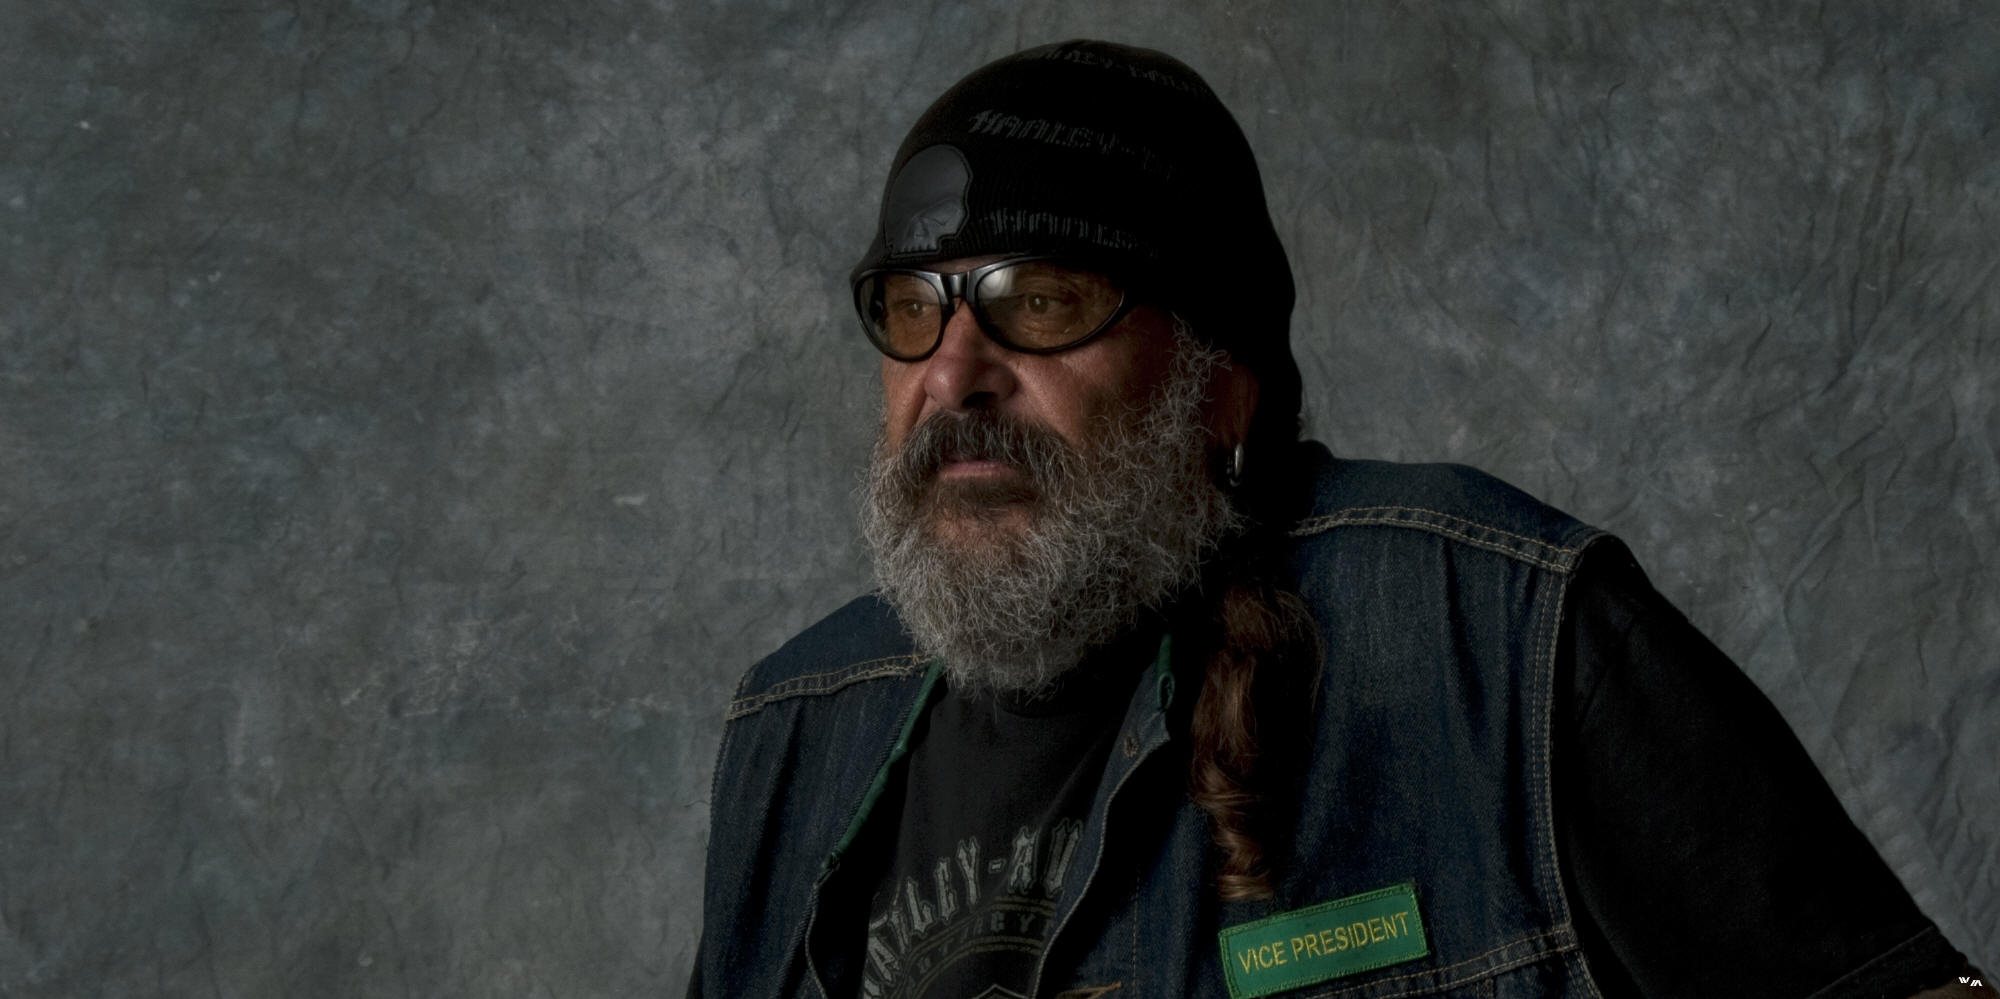
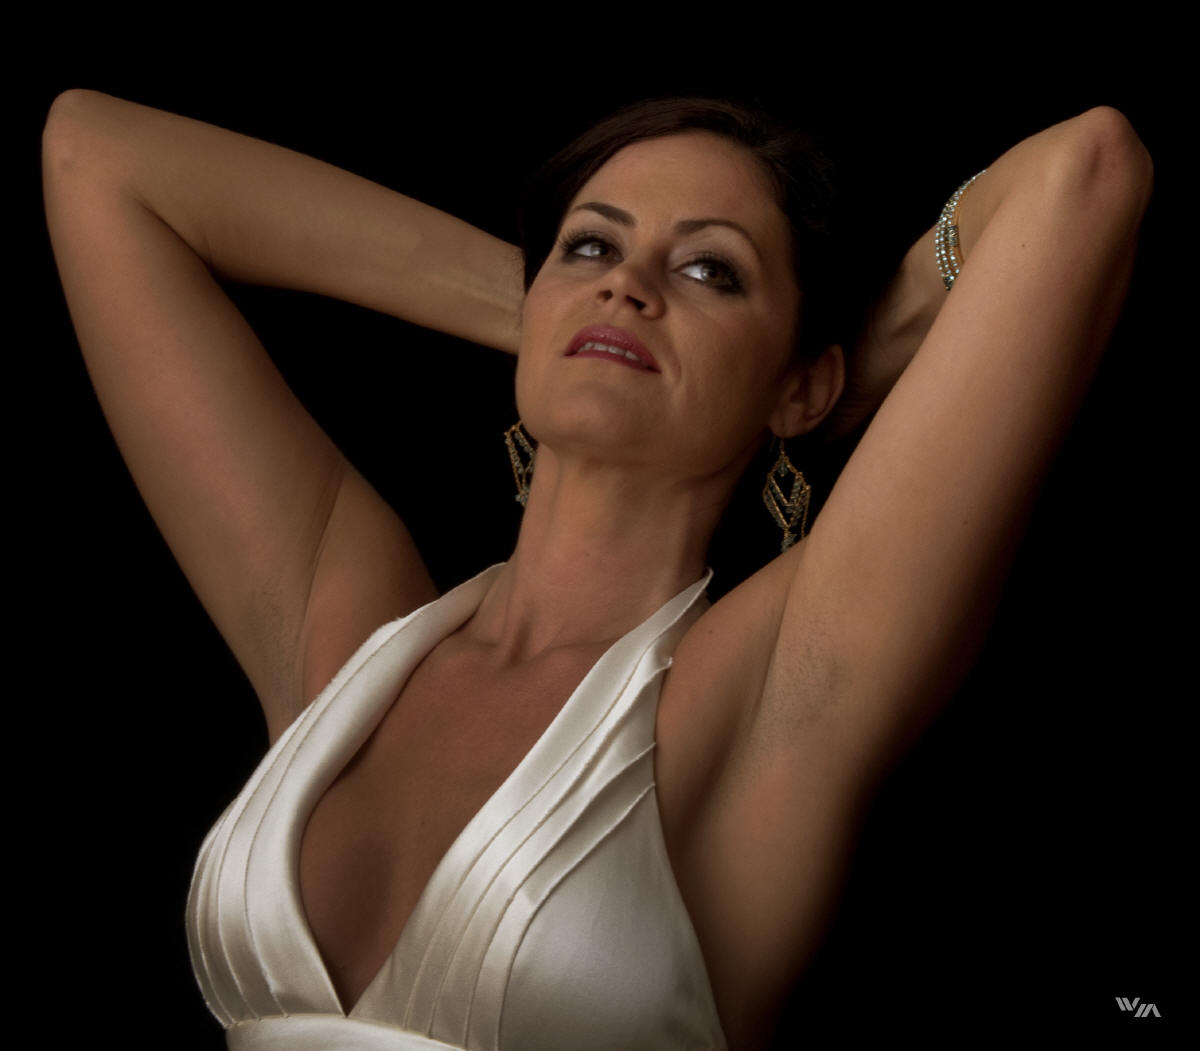
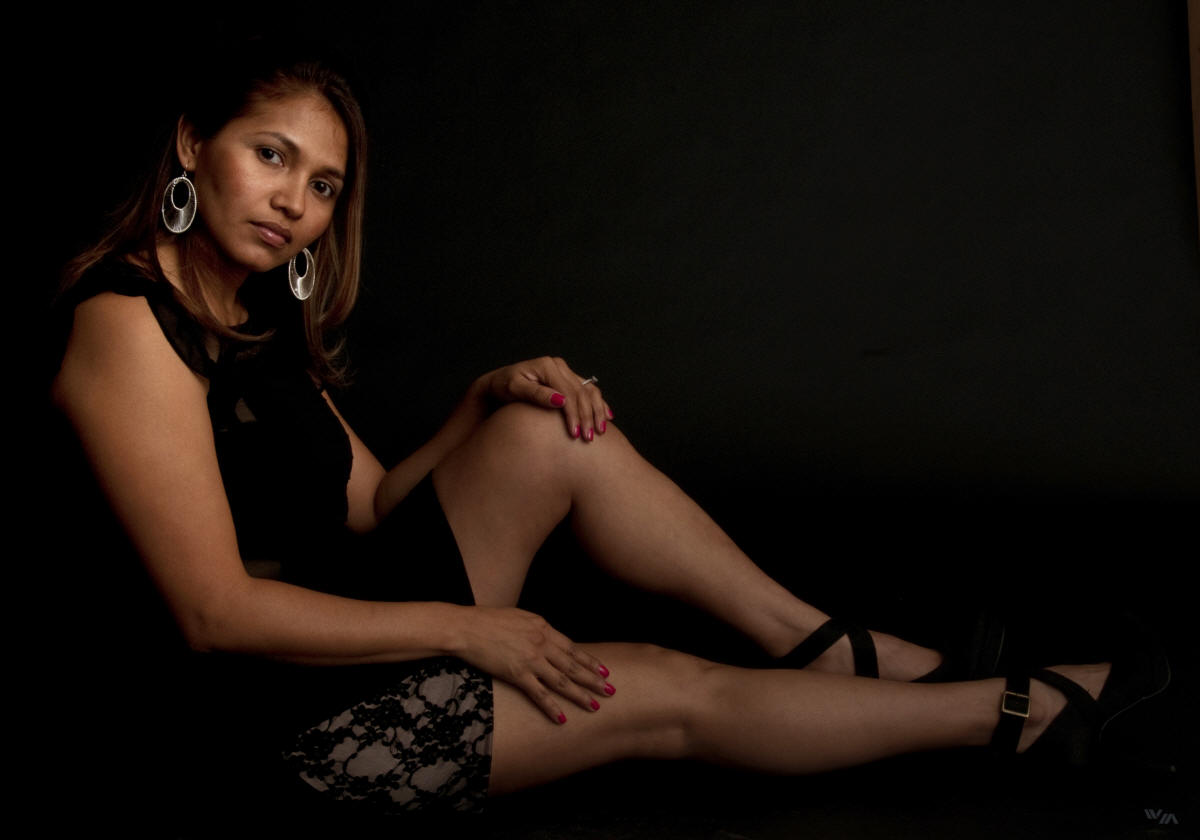
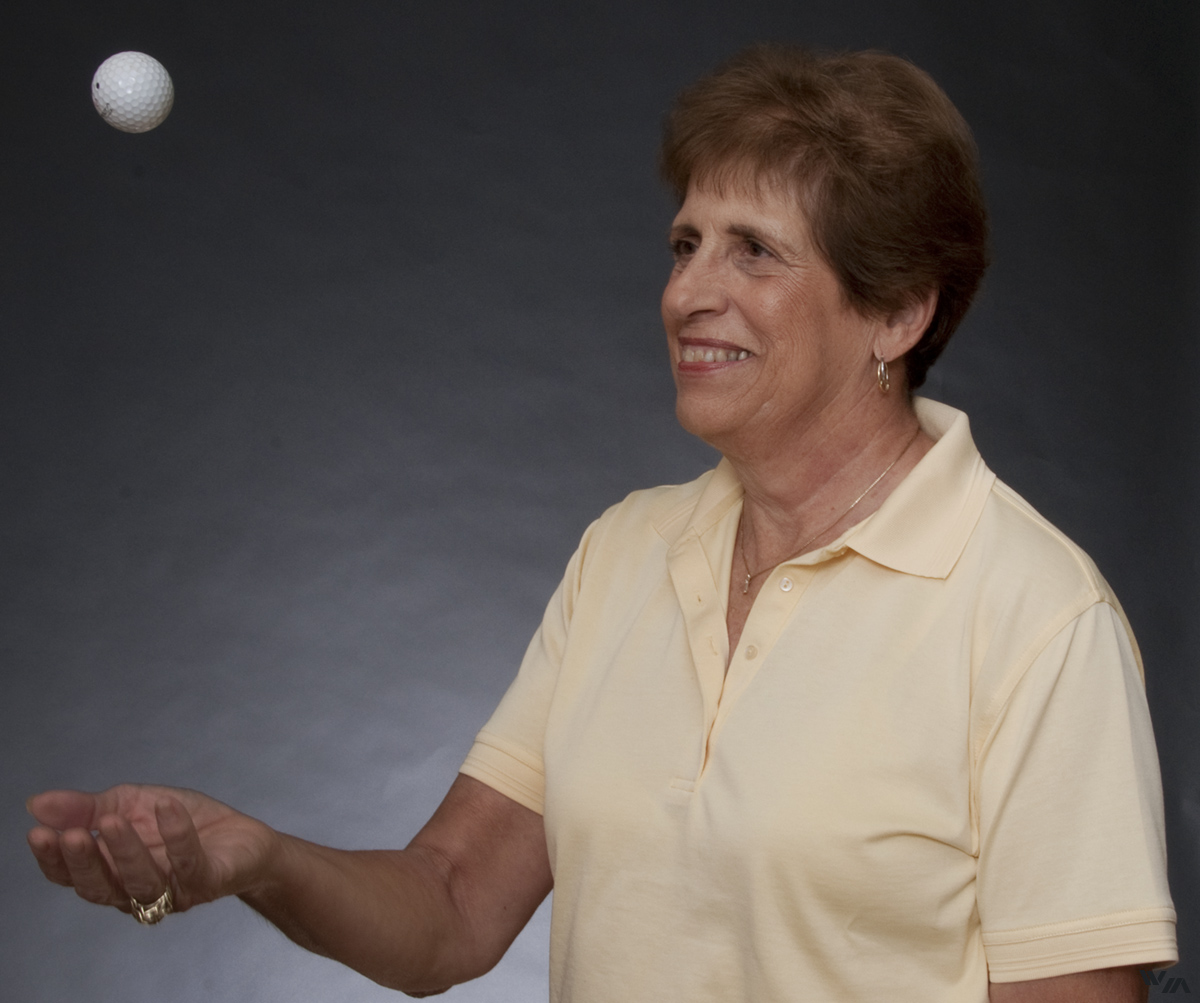
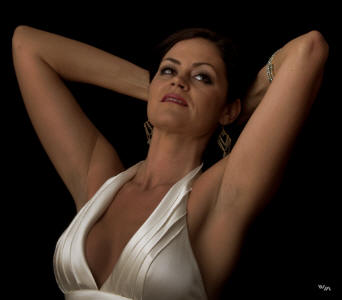
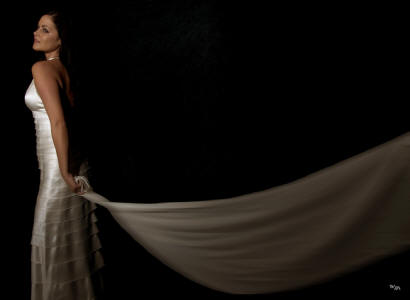
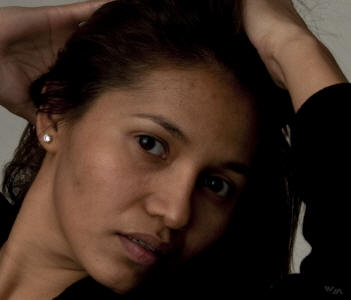
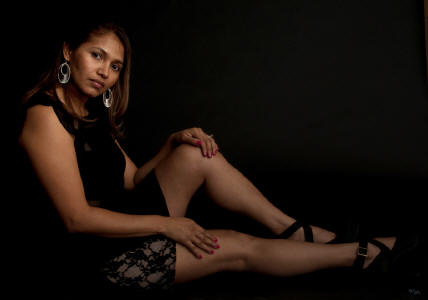
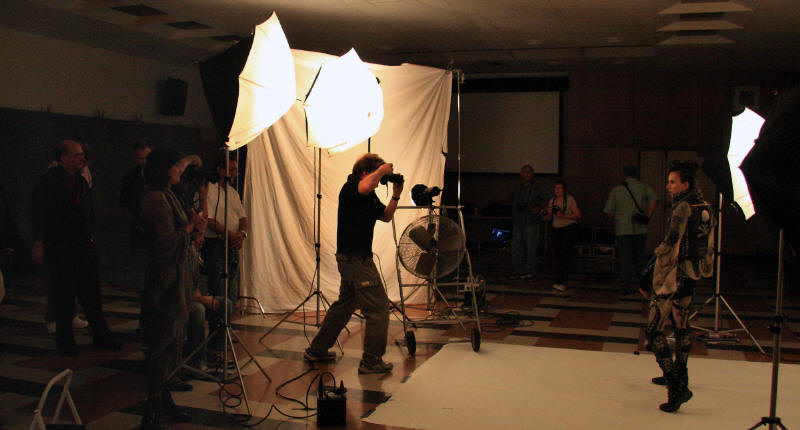
Working with models
A
fascinating part
of my photography class almost every week is to set-up and do
amateur model shoots. I learned a lot about establishing and keeping the
rhythm of the shoot going. Models do what you tell them or show
them to do, otherwise they just stand there looking at you. I
learned to be prepared by getting the all the lights,
backgrounds and camera settings done first and then to build a rapport with
the
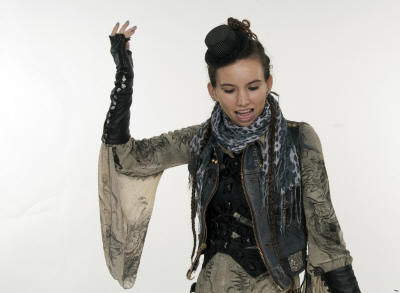
model before starting the shoot. My model shots below of Jenna,
Jaclyn, Katie, Jurgen, Tony, Pirate, Jamie, Hanna, Elizabeth and
Sunny covered a wide variety of
subjects and types of direction needed. With models, technical
accuracy can still result in boring shots unless the pose also
captures the essence of who they are. The confident serenity
that works for Tony the biker would be terrible for exuberant
Jenna the 5 year old. Jaclyn the rocker girl has "attitude"
while Katie and Jamie are elegant and stylish. For Elizabeth, I emphasized her
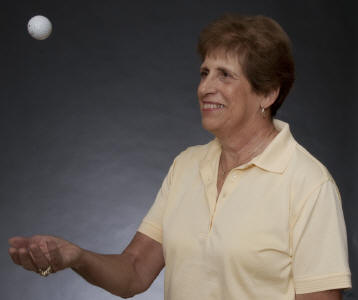
distinctive ethnicity. For Hanna, I brought out her youth and
for Sunny, her maturity and golfer persona.
|
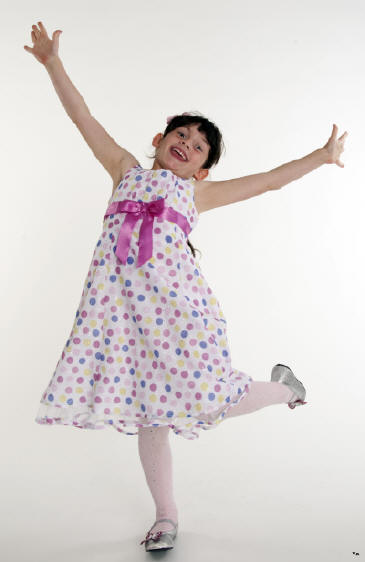
"Jenna flies"
White background
Nikon D300 27mm f18 1/100s ISO200 |
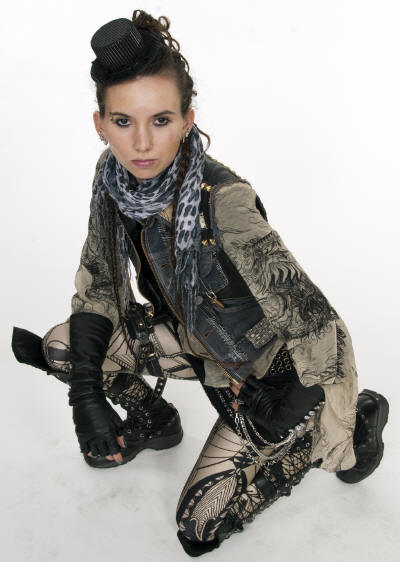
"Jaclyn kneels"
White background
Nikon D300 26mm f14 1/160s ISO100 |
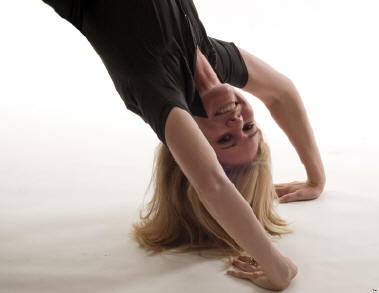
"Katie flips"
White background
Nikon D300 50mm f13 1/125s ISO100 |
"Jaclyn's attitude"
White background
Nikon D300 36mm f16 1/160s ISO100 |
"Katie spins"
Black background
Nikon D300 36mm f9 1/200s ISO100 |
"Jurgen blows"
White background
Nikon D300 35mm f13 1/125s ISO100 |
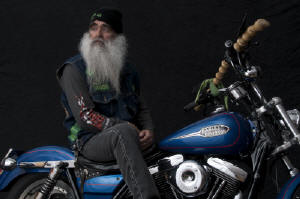
"Tony serene"
Black background
Nikon D300 35mm f13 1/160s ISO100 |

"Pirate stands"
Grey background
Nikon D300 50mm f16 1/160s ISO100 |
"Jamie laid back" Black background,
Fresnel strobe
Nikon D300 105mm f20 1/125s ISO200 |
"Wavy Jamie" Black background, Fresnel
strobe
Nikon D300 70mm f20 1/125s ISO200 |
"Elizabeth close-up" White seamless
background
Nikon D300 42mm f20 1/125s ISO200 |
"Elizabeth's look" Black background
Nikon D300 34mm f20 1/125s ISO200 |
"Hanna's smile"
Grey crush background
Nikon D300 35mm f2.5 1/125s ISO200 |
"Sunny's toss" Black backlight
background
Nikon D300 29mm f20 1/125s ISO200 |
|
|
|
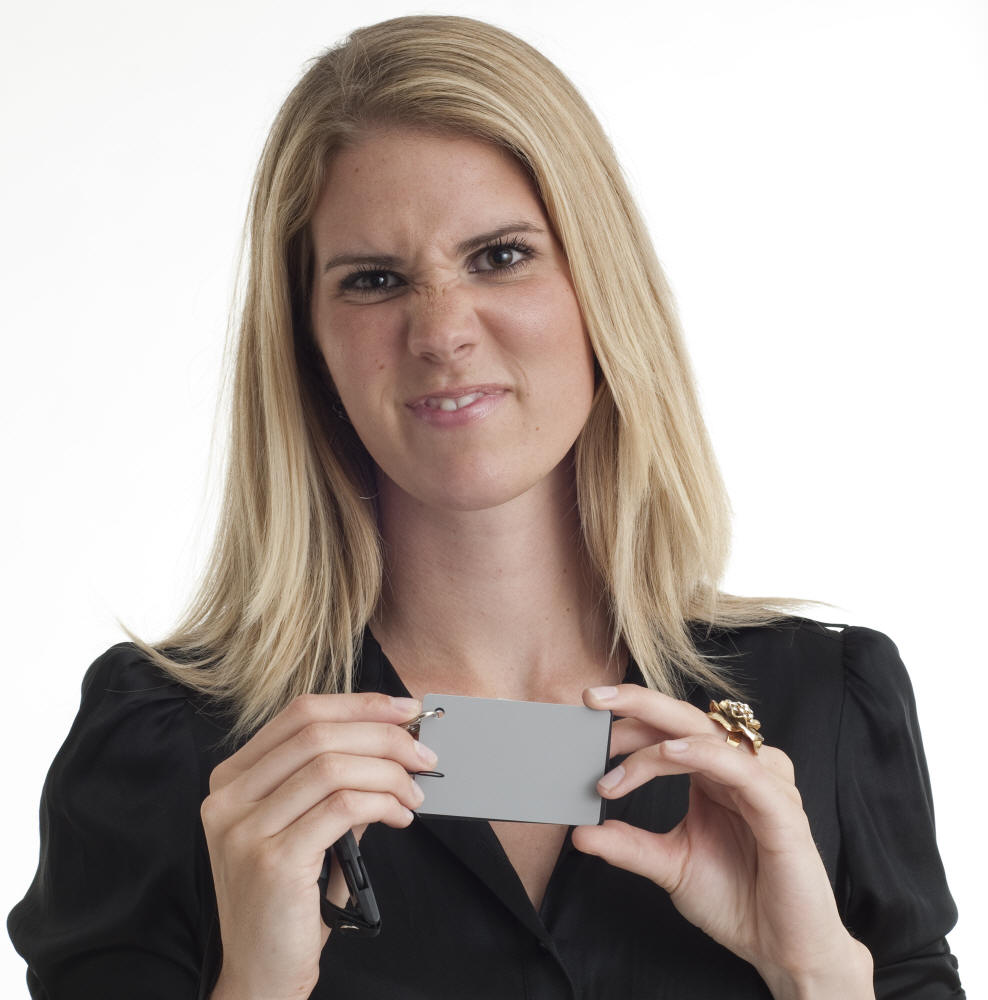
Taking your temperature
Light has a "temperature"
measured in Kelvin which is used in camera white balance.
Morning light and evening light are generally more flattering to
subjects than mid-day light. Artificial lights each have their
own color temperature. The camera's auto white balance will do
its best to adjust for the incoming light, but can be easily
fooled, casting a colored shade over the subject. This is often
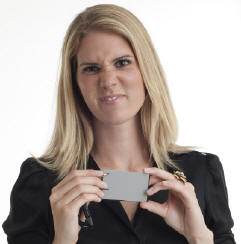
apparent in overly pink or brown flesh tones. The table below
right shows some of the more common color temperatures. A grey card
can be used to fix white balance problems either in the camera or more
easily in
post-processing. A grey card is simply a card with a neutral
grey printed on it that serves as the standard for white
balance. Once you know or have set-up what the light will be for
what you're shooting, take a picture of a grey card at the
exact point where the subject will be. In the first picture
below I asked Katie to hold my portable Opteka grey card while
we were goofing around before the session. Using the grey card
picture in Photoshop during post-processing, I color corrected all of the shots from
that background and lighting set-up.
|
 |
| Color Temperature |
Light Source |
| 1000-2000 K |
Candlelight |
| 2500-3500 K |
Tungsten Bulb (household
variety) |
| 3000-4000 K |
Sunrise/Sunset (clear sky) |
| 4000-5000 K |
Fluorescent Lamps |
| 5000-5500 K |
Electronic Flash |
| 5000-6500 K |
Daylight with Clear Sky (sun
overhead) |
| 6500-8000 K |
Moderately Overcast Sky |
| 9000-10000 K |
Shade or Heavily Overcast Sky |
|
Equipment, gadgets and books
My
current compliment of DSLRs includes a Nikon D800E, D700 and a D300
with a good complement of lenses. My auxiliary/remote flashes are the Nikon
SB-600 & SB-700 speedlights. I have eight Rosco colored gels and a
Lumiquest FXtra to attach them to the speedlights. I also have
two small point and shoot cameras - a 10 megapixel Canon S90 (along with its underwater
enclosure) and a 21 megapixel Sony RX100. I do my post-production work in Lightroom
4.3, Photoshop CS5, Portrait Professional 4 and Photomatix Pro 4.2 (for HDR). I print
at home in super B size (13"x19") using an Epson R1900. My best
source for quality paper for prints is
Red River Paper.
I
standardized early on 77mm filters (along with step-up rings for my
smaller lenses): a Hoya HD circular polarizer (brings out richer
colors and controls reflections - the one filter that's always
in my camera bag), a Tiffen graduated .6 neutral
density (for sunsets), a bunch of neutral densities (for
that silky waterfall effect in daylight) and a Tiffen North Star (special
effect). Digital cameras don't need color filters like film
cameras did. I use six(!) different tripods for various needs. Two
are very stable for big cameras with big lenses, yet still
travel small - the Benro Travel Angel TRCB-069 with an Acratech
GP-s ballhead and the Joby Gorillapod Focus with it's Ballhead X.
I've got arca-swiss compatible plates on my DSLRs and on my
long lenses. Less stable, but lighter and smaller are the
Vanguard Tourist 5 and Joby Gorillapod SLR with it's BH-1 ballhead.
The pocketable Joby GP1
and Flip Video Action are used with my point and shoot & small video cameras.
I have a
(way too) large cadre of cases, each best for particular types of
shoots. My walk-around minimal case is a Thinktank Holster 20
with a Thinktank lens changer 35 attached that holds my DSLR
with a lens attached along with another lens in tow. I have
three back/
sling packs: A ThinkTank Sling-O-Matic 10, a Kata 3n1-11 and a Lowepro Slingshot 102 that hold my
DSLR
with any two or three of my lenses and most of my filters. I
also have a Thinktank Speed Demon - an oversized fanny pack
that carries my DSLR with one lens attached, a couple more
lenses in
tow and a bunch of accessories. Getting even larger, I have a LowePro Slingshot 300AW that
carries my DSLR along with 4 or 5 lenses and looks like a
lopsided backpack. My largest case is a LowePro Stealth Reporter
550AW which carries my DSLR, all my lenses and accessories along
with my portable computer - way too big to carry around on
location, but makes for a good travel and storage case.
Finally,
and definitely in the category of gadgets, is my Columbus nGPS GPS which, when attached,
automatically feeds exact location
information to the camera that is stored with the shot. This is
useful when traveling outside of easily identified locations. A
quick double click of the GPS information tile in Lightroom or
Photoshop and a Google map pops up showing exactly where the
shot was taken.
I highly
recommend some books on photography from which I have learned a lot:
David duChemin's "Within the Frame", Brenda Tharp's "Creative Nature
and Outdoor Photography", Galen Rowell's "Inner Game of Outdoor
Photography" and, specific to my cameras: David Busch's "Nikon D300",
"Nikon D700"
and "Nikon D800".

  
Mackey Group, Inc. © 2002 -
2013

|
|